Traditional Butter Crescent Rolls
There's something magical about the aroma of freshly baked bread wafting through the house, and these Traditional Butter Crescent Rolls are the perfect way to capture that magic. They're buttery, flaky, and reminiscent of those cherished family gatherings. Whether it's a holiday meal or a cozy weekend brunch, these rolls will steal the show.

This post may contain affiliate links. As an Amazon Associate, we earn from qualifying purchases.
Ingredients for Traditional Butter Crescent Rolls
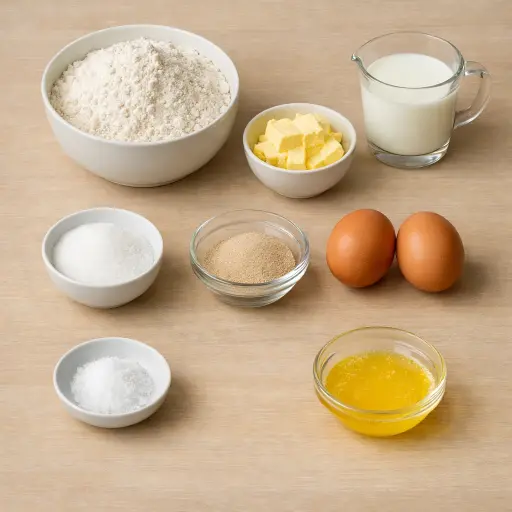
All-purpose flour forms the structure of the rolls, providing just the right amount of gluten for elasticity. Unsalted butter is the star, giving these rolls their signature rich flavor. Granulated sugar adds a touch of sweetness, enhancing the buttery taste without overpowering it. Active dry yeast is the leavening agent that helps the dough rise and achieve that light, airy texture. Whole milk adds moisture and richness, making the dough soft and tender. Large eggs contribute to the structure and richness of the rolls. Lastly, a pinch of salt balances the flavors, ensuring the rolls aren't overly sweet.
Why This Traditional Butter Crescent Rolls Works
Warm milk wakes up the yeast so it starts to bubble and grow. As it sits in the bowl, the yeast feeds on the sugar and slowly fills the dough with tiny gas pockets. While that is happening, the softened butter and eggs spread through the flour and coat the flour particles. That coating keeps the dough soft instead of tough, even though it is kneaded for several minutes.
During kneading, the flour and liquid stretch into long strands that can trap the gas from the yeast. Over time in the warm spot, those strands act like little balloons and the dough rises and becomes light and puffy. When the dough is rolled into circles, brushed with melted butter, and shaped into crescents, thin layers of butter sit between layers of dough.
In the oven, the butter melts and steams, and the gas inside the dough expands. The rolls puff up, the outside sets and browns, and the inside stays soft and tender. A final brush of melted butter soaks into the warm rolls and keeps the crust from drying out.
Traditional Butter Crescent Rolls Tips & Tricks
- If your kitchen is cold, let the dough rise in a slightly warm oven (turn it on for a minute, then off) to speed up the process.
- Use a pizza cutter to slice the dough into wedges quickly and cleanly.
- Brushing the rolls with butter again after baking gives them a beautiful sheen and extra flavor.
Mistakes To Avoid
Letting the milk get too hot kills the yeast before it even starts working. The dough then barely rises, stays dense, and the rolls bake up heavy and tight instead of light and puffy.
Adding all the flour at once often leads to a stiff dough that is hard to knead. The gluten doesn’t stretch well, so the crescents tear while rolling and bake up tough instead of soft and layered.
Kneading too little leaves the dough rough and weak. In the oven, the rolls spread out instead of holding their shape, and the inside stays uneven with tight, gummy spots instead of a smooth, fluffy crumb.
Rolling the dough too thick or too small makes the crescents bulky. The outside browns fast while the inner layers stay a bit doughy, so they look done but feel heavy and slightly underbaked in the center.
Letting the shaped rolls rise too long before baking can cause them to collapse. They puff up huge on the tray, then deflate in the oven and come out flat with a dry, bready texture instead of a soft, layered one.
Equipment Used:
Ingredients
- 3 1/2 cups all-purpose flour
- 1/2 cup unsalted butter, softened
- 1/4 cup granulated sugar
- 1 package (2 1/4 teaspoons) active dry yeast
- 1 cup whole milk
- 2 large eggs
- 1 teaspoon salt
- 1 tablespoon butter, melted
Step-by-step Instructions
- 1. In a small saucepan, warm the milk over low heat until lukewarm.
- 2. In a large bowl, dissolve yeast in the warm milk. Let it stand until frothy, about 5 minutes.
- 3. Stir in the sugar, salt, butter, and eggs until blended.
- 4. Gradually add the flour, 1 cup at a time, mixing until a soft dough forms.
- 5. Knead the dough on a floured surface until smooth and elastic, about 8-10 minutes.
- 6. Place the dough in a greased bowl, cover, and let rise in a warm place until doubled, about 1 hour.
- 7. Punch down the dough and divide it into two equal parts.
- 8. Roll each portion into a 12-inch circle. Brush with melted butter.
- 9. Cut each circle into 12 wedges. Roll up wedges from the wide end towards the point.
- 10. Place crescent rolls, point side down, on greased baking sheets. Curve ends to form crescent shapes.
- 11. Cover and let rise until doubled, about 30 minutes.
- 12. Preheat oven to 375°F (190°C).
- 13. Bake rolls for 12-15 minutes or until golden brown.
- 14. Remove from oven and brush with additional melted butter if desired.
Trending Now
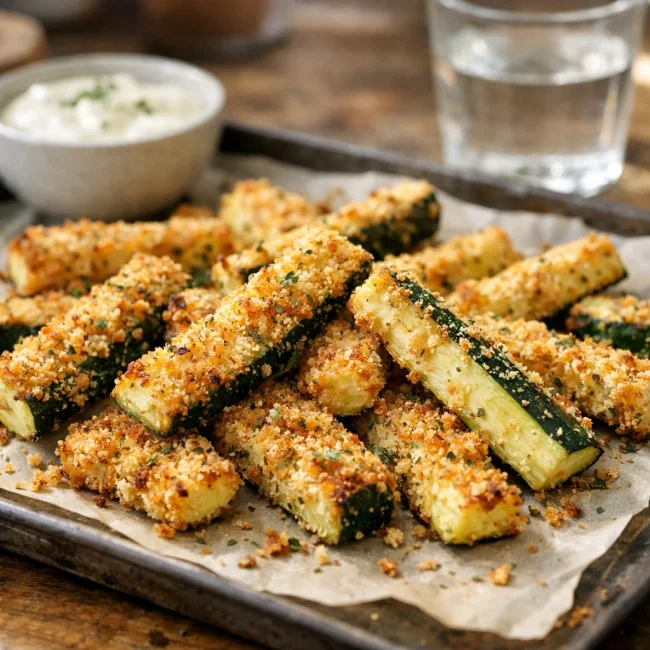
Zucchini Fries
Crispy oven-baked zucchini fries with a golden crust, perfect for a healthy snack ...
View Recipe
Old-Fashioned Bread Pudding
Discover the classic charm of Old-Fashioned Bread Pudding - a timeless dessert com...
View Recipe
Classic Cinnamon Rolls
Indulge in the sweet embrace of our homemade cinnamon rolls, perfect for breakfast...
View Recipe
Traditional Hollandaise Sauce
Discover the rich and creamy essence of traditional Hollandaise Sauce, perfect for...
View RecipeFrequently Asked Questions
- Can I make the dough ahead of time?
- Yes, you can prepare the dough a day in advance. Let it rise, then punch it down and store it in the fridge overnight. Bring it to room temperature before shaping.
- Can I freeze these rolls?
- Absolutely! Once baked, let them cool completely, then freeze in an airtight container. Reheat in the oven before serving.
More Breads & Baked Goods Recipes

Traditional Italian Easter Bread
Savor the delightful taste of a classic Italian Easter bread, a sweet, soft, and s...
View Recipe
Old-Fashioned Pineapple Bread
A delightful and flavorful bread infused with juicy pineapple, perfect for breakfa...
View Recipe
Old-Fashioned Blueberry Muffins
Transport yourself to simpler times with these delightful old-fashioned blueberry ...
View Recipe
Strawberry Basil Scones
These tender scones combine the sweetness of fresh strawberries with a hint of pep...
View Recipe