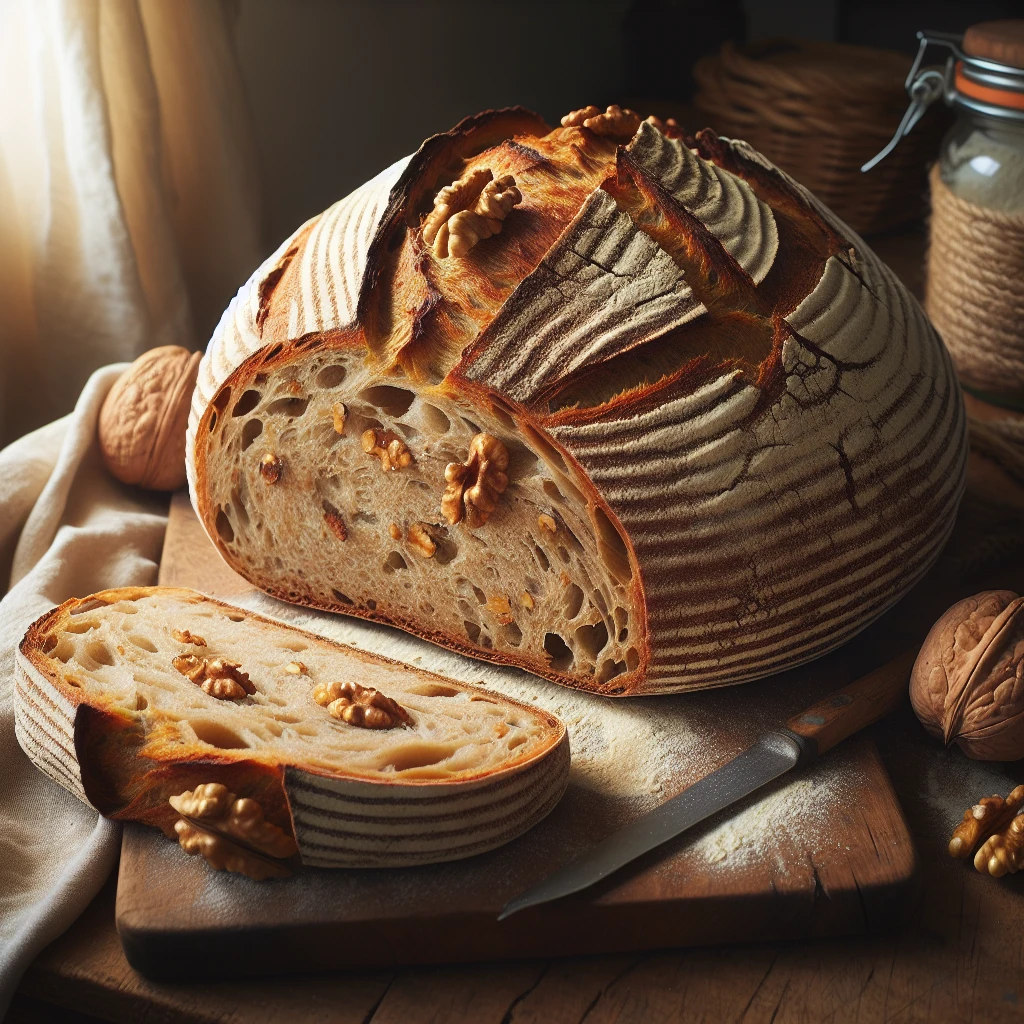
Rustic Walnut Sourdough Bread
This Rustic Walnut Sourdough Bread brings together the earthy richness of toasted walnuts with the tangy depth of sourdough. It's perfect for a cozy breakfast or an artisan addition to your bread basket. Let's dive into making this delightful loaf!
This post may contain affiliate links. As an Amazon Associate, we earn from qualifying purchases.
Ingredients for Rustic Walnut Sourdough Bread
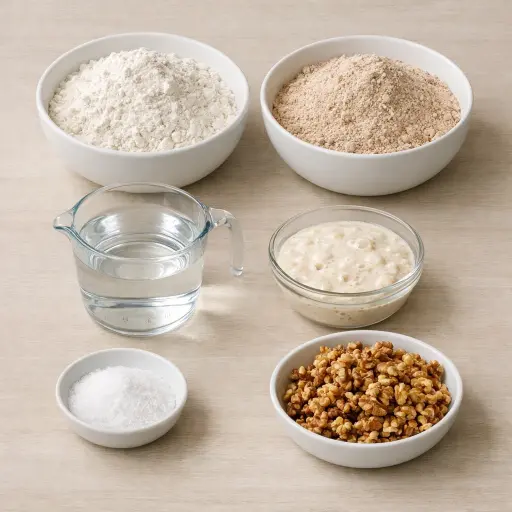
All-purpose flour provides a versatile base, giving the bread structure and a balanced crumb. Whole wheat flour adds a hearty texture and enhances the nutty flavor profile. Water is the liquid gold that hydrates the flour, allowing gluten to develop. Sourdough starter, when active and bubbly, acts as the natural leaven, infusing the dough with its unique tang. Salt not only enhances flavor but also strengthens the dough structure. Finally, walnuts bring a delicious, toasted crunch to each bite.
Why This Rustic Walnut Sourdough Bread Works
During the first rest, the flours soak up the water and relax. The dough starts out rough and tight, but after sitting, it becomes smoother and easier to stretch. When the sourdough starter goes in, the wild yeast and bacteria spread through the dough and begin to puff it up. Salt tightens things a bit so the dough doesn’t spread out like a puddle and instead holds a nice shape.
As the stretch-and-folds go on, the dough slowly builds strength. Each round lines up the gluten in the flours so the dough can trap the gas from the starter. The walnuts get tucked in and stay suspended instead of sinking or clumping. During the long room-temperature rise and then the cold rest in the fridge, tiny bubbles grow and the dough firms up, so it can be shaped and scored without collapsing.
In the hot Dutch oven, steam from the wet dough stays around the loaf. The crust stays soft for the first part of baking, so the bread can rise high before it sets. By the time the lid comes off, the inside has set and the outside can dry out and brown, giving a crisp crust and a chewy, open crumb around the walnuts.
Rustic Walnut Sourdough Bread Tips & Tricks
- Always use an active, bubbly sourdough starter for the best rise.
- Toast the walnuts before adding them to bring out the oils and enhance their flavor.
- If your dough is sticky, wet your hands slightly before handling it.
- For a deeper sour flavor, extend the cold retardation in the fridge up to 24 hours.
Mistakes To Avoid
Adding the sourdough starter before the initial 30-minute rest changes the dough completely. The flour never gets that first chance to soak up the water on its own, so the gluten stays weaker and the dough tears instead of stretching. The loaf then bakes up flatter and denser, with less rise and a tighter crumb.
Letting the bulk rise go too short or too long throws off the whole structure. When it is cut short, the dough goes into the fridge still tight and stiff, so it barely puffs in the oven and stays heavy in the center. When it goes too long, the dough turns loose and fragile, spreads out in the Dutch oven, and bakes into a wide, flat loaf with a gummy middle.
Working the walnuts in too early or too roughly can shred the dough. The sharp edges cut through the gluten strands while they are still forming, so the dough never gets stretchy. In the oven this shows up as a loaf that splits in random places, with big holes around the nuts and dense patches in between.
Skipping the overnight chill or cutting it very short changes how the bread bakes. Without that long cold rest, the dough goes into the oven warmer and looser, so it can spread sideways before it sets. The crust still browns, but the loaf often comes out shorter, with a less even crumb and less chew.
Starting with a Dutch oven that is not fully preheated keeps the bread from springing up. The dough hits warm, not blazing-hot, metal, so the outside sets slowly instead of trapping steam. The result is a paler, thicker crust and a loaf that rises less and looks squat.
Equipment Used:
Dutch oven, Large mixing bowl, Bench scraper, Banneton, Cooling rack
Ingredients
- 3 cups all-purpose flour
- 1 1/2 cups whole wheat flour
- 1 1/2 cups water
- 1/2 cup sourdough starter, active and bubbly
- 1 1/2 teaspoons salt
- 1 cup walnuts, toasted and chopped
Step-by-step Instructions
- 1. In a large bowl, mix flours and water until no dry flour remains. Let it sit for 30 minutes.
- 2. Add the sourdough starter and salt to the dough. Mix until well incorporated.
- 3. Work in the walnuts, ensuring they are evenly distributed.
- 4. Perform a series of stretch and folds every 30 minutes for 2 hours.
- 5. Let the dough rise at room temperature until doubled in size, about 4-6 hours.
- 6. Shape the dough into a boule and place it in a floured banneton.
- 7. Cover and refrigerate overnight for a cold retardation.
- 8. Preheat the oven to 475°F with a Dutch oven inside.
- 9. Carefully transfer the dough into the preheated Dutch oven, score the top, and cover with the lid.
- 10. Bake for 20 minutes, remove the lid, and bake for another 25 minutes until golden brown.
- 11. Let cool on a wire rack before slicing.
Trending Now

Zucchini Fries
Crispy oven-baked zucchini fries with a golden crust, perfect for a healthy snack ...
View Recipe
Old-Fashioned Bread Pudding
Discover the classic charm of Old-Fashioned Bread Pudding - a timeless dessert com...
View Recipe
Classic Cinnamon Rolls
Indulge in the sweet embrace of our homemade cinnamon rolls, perfect for breakfast...
View Recipe
Traditional Hollandaise Sauce
Discover the rich and creamy essence of traditional Hollandaise Sauce, perfect for...
View RecipeFrequently Asked Questions
- Can I omit the whole wheat flour?
- Yes, you can use only all-purpose flour for a lighter crumb, but the whole wheat adds a nice depth of flavor.
- What if I don't have a Dutch oven?
- You can use any oven-safe pot with a lid or bake on a baking stone with a steam tray in the oven to mimic the steam environment.
- How do I know if my starter is ready?
- Your starter should be bubbly and double in size within 4-6 hours of feeding. It should also have a pleasant tangy aroma.
Serving Ideas for Rustic Walnut Sourdough Bread
This bread is divine with a smear of soft butter and honey. Try it alongside a creamy pumpkin soup for a fall dinner, or use it for an elevated turkey and cranberry sandwich. It's also a fantastic base for avocado toast topped with fresh herbs.
More Breads & Baked Goods Recipes

Traditional Italian Easter Bread
Savor the delightful taste of a classic Italian Easter bread, a sweet, soft, and s...
View Recipe
Old-Fashioned Pineapple Bread
A delightful and flavorful bread infused with juicy pineapple, perfect for breakfa...
View Recipe
Old-Fashioned Blueberry Muffins
Transport yourself to simpler times with these delightful old-fashioned blueberry ...
View Recipe
Strawberry Basil Scones
These tender scones combine the sweetness of fresh strawberries with a hint of pep...
View Recipe