
Maple Walnut Cheesecake
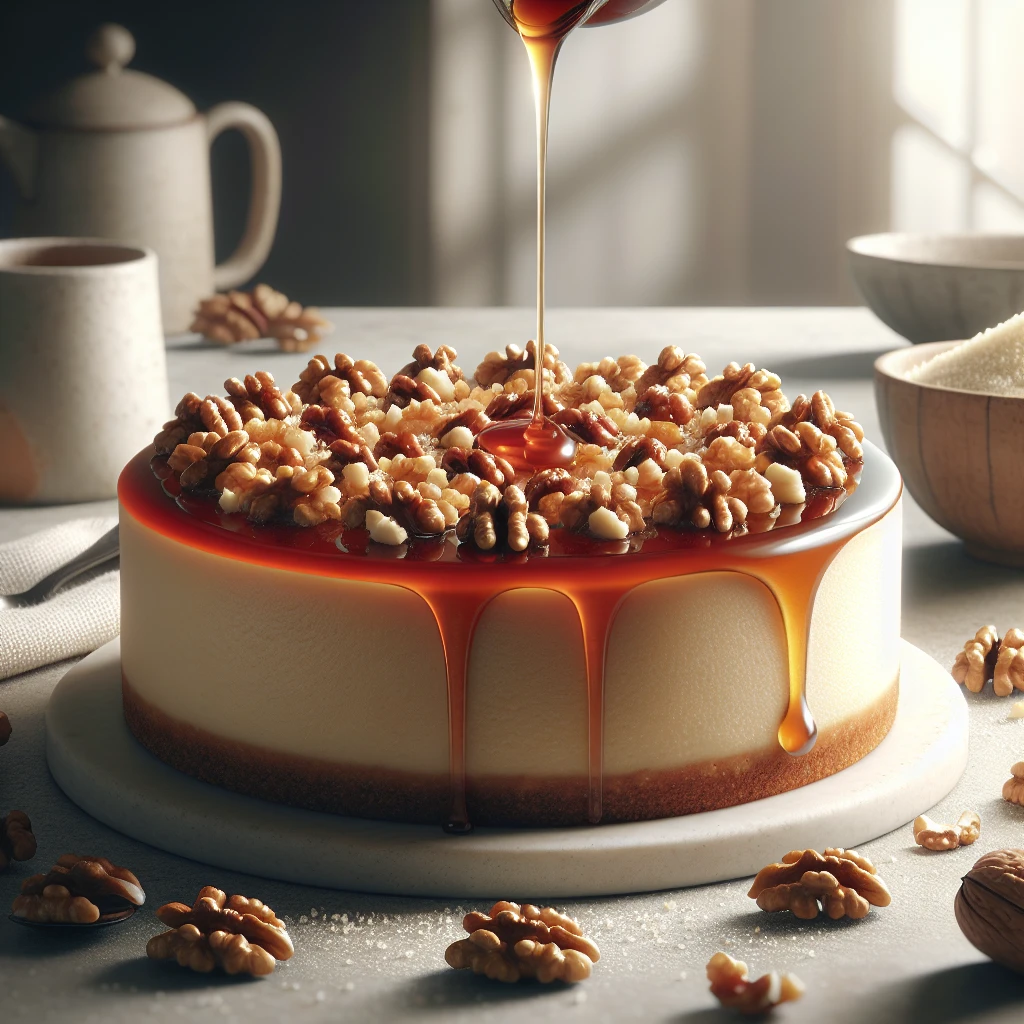
If you're looking to bring a touch of autumn into your kitchen, this Maple Walnut Cheesecake is your ticket. The creamy texture paired with the earthy sweetness of maple and the satisfying crunch of toasted walnuts makes it a real standout dessert. It's a perfect treat for cozy gatherings or a delightful finish to any meal.
 Share
Share
This post may contain affiliate links. As an Amazon Associate, we earn from qualifying purchases.
Ingredients for Maple Walnut Cheesecake
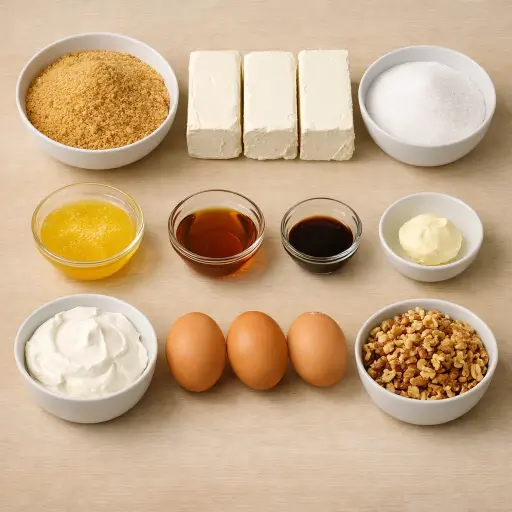
Graham cracker crumbs form the base of the crust, providing a sweet and slightly crunchy foundation. Unsalted butter acts as the glue, binding the crumbs together while adding richness.
Cream cheese is the star, giving the cheesecake its signature smoothness. Granulated sugar sweetens the deal without overpowering the delicate maple flavor. Pure maple syrup adds depth with its earthy sweetness, distinguishing this cheesecake from the rest.
Sour cream contributes a subtle tanginess, balancing the sweetness and enriching the texture. Vanilla extract enhances all the flavors with its warm aroma.
Eggs provide structure, helping the cheesecake set properly. Chopped walnuts add a delightful crunch and nutty flavor that pairs beautifully with the maple. And finally, whipped cream is optional but makes for a lovely, airy topping.
Why This Maple Walnut Cheesecake Works
In the oven, the cream cheese, sour cream, eggs, and sugar slowly set into a smooth, firm custard. As the heat moves through the pan, the eggs tighten up just enough to hold everything in place, so the cheesecake slices cleanly instead of running or cracking apart. The sour cream keeps the filling soft and a little tangy, so it doesn’t bake up dry or crumbly.
While it bakes, the maple syrup spreads through the creamy base instead of sitting in one spot, so every bite tastes the same. Toasted walnuts stay suspended in the thick batter, rather than sinking, because the cream cheese mixture is already quite dense before it goes in the oven. After baking, the long chill in the fridge finishes the job: the filling firms up all the way through, the crust sticks to the bottom, and the whole cheesecake holds together when the springform ring comes off.
Maple Walnut Cheesecake Tips & Tricks
- Room temperature cream cheese ensures a smoother batter with no lumps.
- Bake the cheesecake with a water bath to help prevent cracks, if desired.
- Toast the walnuts beforehand to bring out a richer flavor.
Mistakes To Avoid
Letting the cheesecake bake until a toothpick comes out totally clean can dry it out. The center then firms up too much as it cools, so instead of a smooth, creamy slice, the texture turns stiff and slightly crumbly with cracks on top.
Using cream cheese that is still cold from the fridge often leaves small lumps that never fully beat out. Those lumps stay in the batter and bake that way, so the finished cheesecake has little grainy bits instead of a silky, even filling.
Beating the eggs too long after adding them can whip in a lot of air. In the oven, that extra air makes the cheesecake puff up and then collapse as it cools, leaving a sunken middle and a spongy, bouncy texture instead of dense and creamy.
Skipping the chilling time in the fridge means the center does not fully set. The cheesecake may slice messy and soft, and the filling can feel loose and custardy instead of holding clean, firm slices.
Equipment Used:
Springform pan, Electric mixer, Mixing bowls, Spatula, Wire rack
Ingredients
- 1 1/2 cups graham cracker crumbs
- 1/4 cup unsalted butter, melted
- 1 1/4 cups granulated sugar
- 3 8-ounce packages cream cheese, softened
- 1/4 cup pure maple syrup
- 1 cup sour cream
- 1 teaspoon vanilla extract
- 3 large eggs
- 1 cup chopped walnuts, toasted
- Whipped cream for topping (optional)
Step-by-step Instructions
- 1. Preheat oven to 325°F (160°C).
- 2. In a medium bowl, combine graham cracker crumbs and melted butter; press mixture evenly into the bottom of a 9-inch springform pan.
- 3. In a large bowl, beat cream cheese and sugar until smooth and creamy.
- 4. Add maple syrup, sour cream, and vanilla extract, beating until well blended.
- 5. Add eggs, one at a time, beating just until blended after each addition.
- 6. Stir in toasted walnuts.
- 7. Pour the filling over the crust in the springform pan.
- 8. Bake for 55-60 minutes or until center is set and a toothpick inserted comes out clean.
- 9. Remove from oven and cool completely on a wire rack.
- 10. Chill in the refrigerator for at least 4 hours or overnight before serving.
- 11. Serve topped with whipped cream if desired.
Trending Now
Traditional Salisbury Steak
Experience the rich flavors of this traditional Salisbury Steak, a classic America...
View Recipe
Traditional Pickled Beets
Experience the timeless taste of pickled beets with this classic recipe. Savor the...
View Recipe
Traditional Dump Cake
Discover the timeless delight of the Traditional Dump Cake, a simple and scrumptio...
View Recipe
Traditional Hollandaise Sauce
Discover the rich and creamy essence of traditional Hollandaise Sauce, perfect for...
View RecipeFrequently Asked Questions
- Can I use a different nut instead of walnuts?
- Yes, pecans or almonds can work nicely as substitutes.
- What if I don't have a springform pan?
- You can use a regular baking pan, but be sure to line it with parchment paper for easier removal.
Serving Ideas for Maple Walnut Cheesecake
This cheesecake is delightful on its own, but you can top it with a dollop of whipped cream for extra indulgence. For a touch of freshness, serve with a side of fresh berries or a drizzle of additional maple syrup.
More Desserts Recipes
Rustic Vanilla Peach Cobbler
This rustic vanilla peach cobbler combines a rich, buttery crust with the sweet, v...
View Recipe
Traditional Lemon Curd
A classic, tangy lemon curd that is perfect for enhancing desserts, breakfast dish...
View Recipe
Traditional Cream Cheese Pie
A delightful and timeless dessert, Traditional Cream Cheese Pie offers a rich and ...
View Recipe
Timeless Cream Puff Delight
Indulge in a delectable Timeless Cream Puff Delight, a classic dessert featuring a...
View Recipe