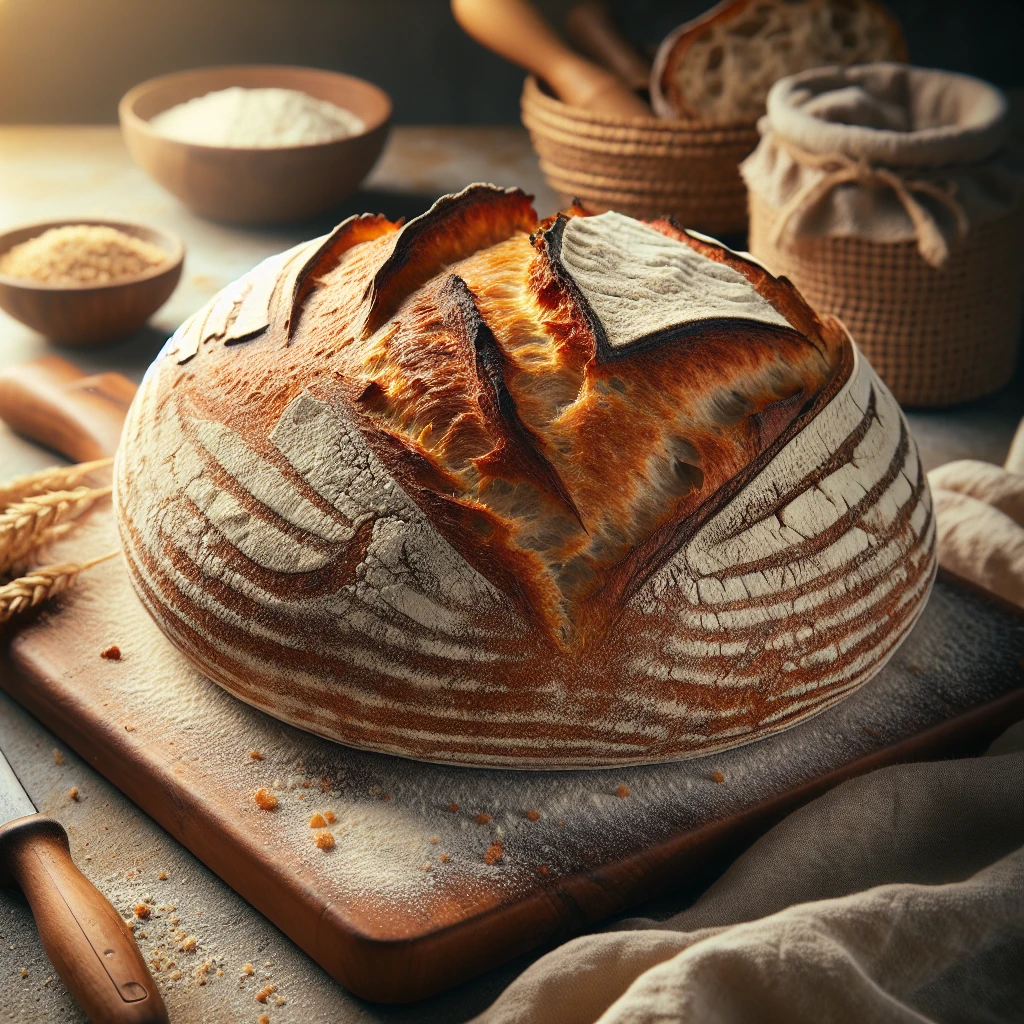
Heritage Sourdough Loaf
Welcome to the world of sourdough baking with this Heritage Sourdough Loaf recipe. It's a perfect blend of simplicity and tradition, creating a beautifully crusty bread that’s as rewarding to make as it is to eat.
This post may contain affiliate links. As an Amazon Associate, we earn from qualifying purchases.
Ingredients for Heritage Sourdough Loaf
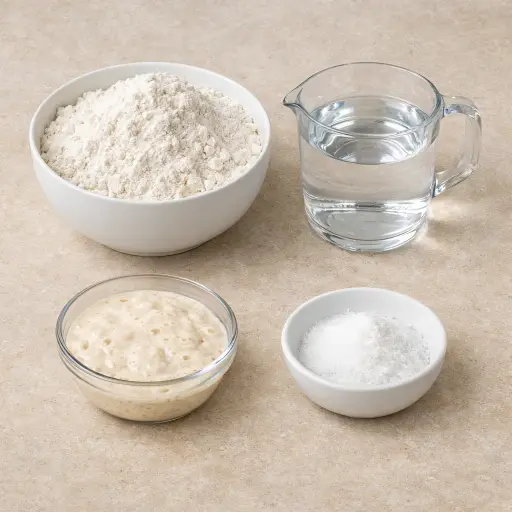
All-purpose flour forms the foundation of this bread, providing structure and texture. You can experiment with whole grain flours for added depth, but start simple.
Water is essential not just for hydration but also for activating the gluten in the flour, which gives the bread its chewy texture.
The active sourdough starter is the heart of the loaf, bringing both rise and a unique tangy flavor. Make sure it's bubbly and active before use for best results.
Salt isn't just for taste; it controls the yeast activity, ensuring the dough rises at the right pace and enhances the overall flavor.
Why This Heritage Sourdough Loaf Works
At the start, the flour and water sit together without the starter so the flour can drink up the water. During that 30‑minute rest, the dough relaxes and the flour swells, so later it stretches instead of tearing. Once the sourdough starter and salt go in, the dough can be kneaded into a smooth, springy ball. As it is worked, long strands form inside the dough, which lets it trap air and hold its shape.
Over the 4 hours in the bowl, the starter slowly eats the flour and makes gas. Those bubbles stay inside the stretchy dough, so it rises higher each hour. The folds during this time tighten the dough and stack those strands, so the loaf stands tall instead of spreading out. In the banneton, the dough has one more rise, which gives it a lighter crumb.
In the hot Dutch oven, steam from the wet dough stays around the loaf at first, so the crust stays soft while the bread expands. Once the lid comes off, the outside dries and browns, while the inside finishes setting into a chewy, open crumb.
Heritage Sourdough Loaf Tips & Tricks
- Keep your sourdough starter active by feeding it regularly; this ensures a good rise and flavor.
- If the dough feels too sticky, dampen your hands instead of adding more flour.
- For a more complex flavor, let the dough proof in the fridge overnight during the final rise.
Mistakes To Avoid
Adding the starter and salt before the initial 30-minute rest makes the dough harder to stretch and slows down how it puffs up. The flour never fully soaks up the water, so the dough stays tight and stiff. The finished loaf often comes out dense with a tight crumb instead of those bigger, irregular holes.
Skipping the hourly folds during the 4-hour rise leaves the dough weak and slack. The gluten never gets reinforced, so the dough spreads out instead of holding a nice shape. In the oven, the loaf tends to flatten, with less rise and a gummy, uneven interior.
Transferring very soft dough straight from the banneton into the hot Dutch oven without confidence often leads to dropping or deflating it. The dough can collapse, smear, or stick to the sides, which ruins the surface tension. The baked bread then comes out lopsided with poor oven spring and a thick, uneven crust.
Cutting into the loaf while it is still hot lets the steam rush out too fast. The crumb is still setting, so the slices squash and smear together. As it cools, the inside can turn a bit gummy and the texture feels heavy instead of light.
Equipment Used:
Ingredients
- 3 cups all-purpose flour
- 1 1/2 cups water
- 1/2 cup active sourdough starter
- 1 1/2 teaspoons salt
Step-by-step Instructions
- 1. In a large mixing bowl, combine the flour and water. Mix until a shaggy dough forms. Let it rest for 30 minutes.
- 2. Add the sourdough starter and salt. Knead the dough until it is smooth and elastic, about 10 minutes.
- 3. Transfer the dough to a lightly oiled bowl, cover it, and let it rise at room temperature for 4 hours, folding the dough every hour.
- 4. Shape the dough into a ball and place it in a floured banneton (proofing basket). Cover and let it rise for another 2 hours.
- 5. Preheat your oven to 475°F (245°C). Place a Dutch oven inside to heat up.
- 6. Carefully transfer the dough from the banneton to the preheated Dutch oven. Score the top of the loaf with a sharp blade.
- 7. Cover with the lid and bake for 20 minutes. Remove the lid and bake for an additional 25 minutes until the crust is golden brown.
- 8. Remove the bread from the oven and let it cool on a wire rack before slicing.
Trending Now

Old-Fashioned Pancakes
Relish in the simplicity and comfort of homemade old-fashioned pancakes, perfect f...
View Recipe
Spiced Brown Sugar Pork Chops
A delightful twist on traditional pork chops, featuring a brown sugar glaze mixed ...
View Recipe
Moist Banana Loaf
Discover the timeless charm of our Moist Banana Loaf, a luscious and tender treat ...
View Recipe
Classic Blueberry Muffins
Deliciously moist and fluffy, these classic blueberry muffins are bursting with fr...
View RecipeFrequently Asked Questions
- Can I use whole wheat flour?
- Yes, you can substitute up to half of the all-purpose flour with whole wheat flour for a nuttier flavor.
- What if my dough doesn’t rise?
- Ensure your starter is active and bubbly. Room temperature also affects rise; a warmer environment can help.
Serving Ideas for Heritage Sourdough Loaf
This sourdough loaf pairs wonderfully with a hearty soup or stew. Try it toasted with a generous spread of creamy brie or simply enjoy it with a touch of butter and a sprinkle of sea salt.
More Breads & Baked Goods Recipes

Traditional Italian Easter Bread
Savor the delightful taste of a classic Italian Easter bread, a sweet, soft, and s...
View Recipe
Old-Fashioned Pineapple Bread
A delightful and flavorful bread infused with juicy pineapple, perfect for breakfa...
View Recipe
Old-Fashioned Blueberry Muffins
Transport yourself to simpler times with these delightful old-fashioned blueberry ...
View Recipe
Strawberry Basil Scones
These tender scones combine the sweetness of fresh strawberries with a hint of pep...
View Recipe