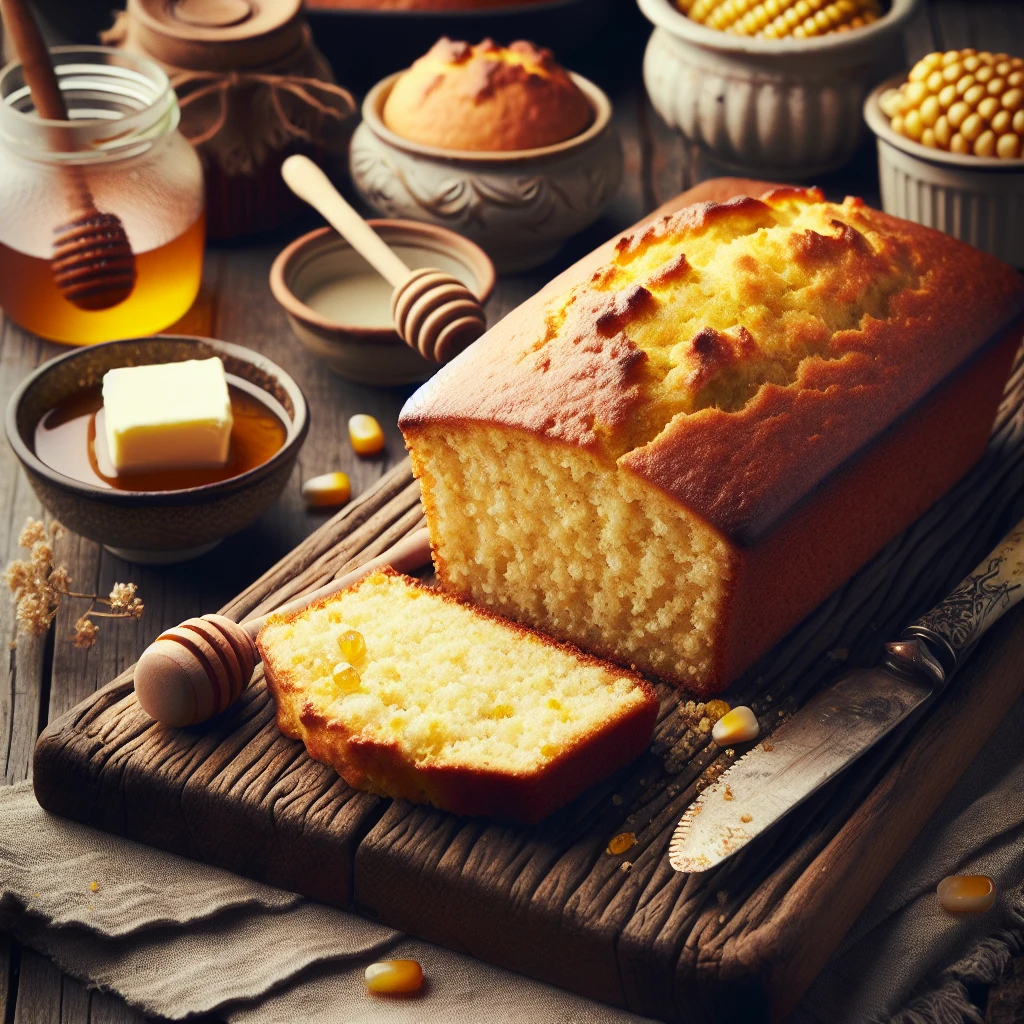
Wholesome Honey Corn Bread
If you’re looking for a comforting side dish that’s both sweet and savory, this Wholesome Honey Corn Bread is a must-try. With its golden crust and moist interior, it’s perfect for any meal.
This post may contain affiliate links. As an Amazon Associate, we earn from qualifying purchases.
Ingredients for Wholesome Honey Corn Bread
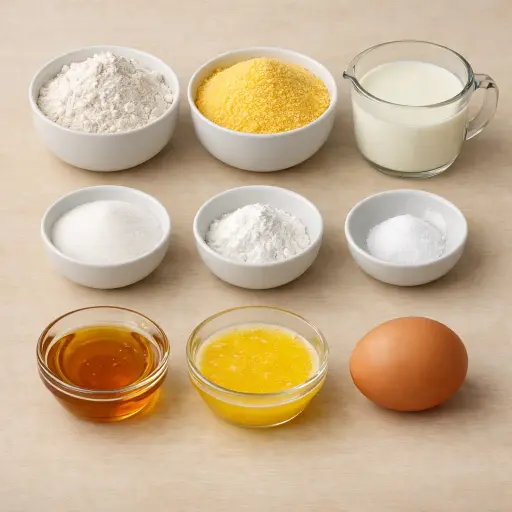
All-purpose flour provides the structure needed to hold the cornbread together while keeping it light. Yellow cornmeal gives that classic cornbread texture and flavor we all love. A bit of granulated sugar enhances the natural sweetness without overpowering the honey. The baking powder acts as a leavening agent, ensuring the bread rises well. Salt brings out the flavors of all the ingredients, balancing the sweetness. Buttermilk adds a tangy richness that complements the honey. Honey not only sweetens the bread but also gives it a lovely moist texture. Unsalted butter adds a rich, creamy flavor, while a large egg binds everything together.
Why This Wholesome Honey Corn Bread Works
In the bowl, the dry and wet parts stay separate until the very end, so the baking powder does not start working too early. Once the buttermilk, honey, butter, and egg hit the flour and cornmeal, the baking powder starts to bubble a little, but the batter is baked soon after. In the oven, those bubbles grow and lift the batter, so the corn bread rises instead of staying dense.
As it bakes, the egg sets and gives the bread some structure, while the flour and cornmeal firm up around the air pockets. Honey and sugar keep the inside moist, so it stays soft instead of drying out. Melted butter spreads through the batter and keeps the crumb tender. During baking, the edges cook a bit faster and dry slightly, so the outside holds its shape and slices cleanly after a short rest in the pan.
Wholesome Honey Corn Bread Tips & Tricks
- For an extra boost of flavor, add a teaspoon of vanilla extract to the wet ingredients.
- If you don't have buttermilk, make a quick substitute by mixing 1 cup of milk with 1 tablespoon of lemon juice or vinegar.
- To avoid a crumbly texture, be careful not to overbake — keep an eye on it after 20 minutes.
Mistakes To Avoid
Letting the cornbread bake too long at 400°F quickly dries it out. The edges turn hard and the top can get overly dark while the inside loses moisture, so instead of a soft crumb it becomes crumbly and stiff once cooled.
Overmixing the batter after the wet ingredients go into the dry ones makes the bread dense. The flour soaks up more liquid and the batter tightens, so the cornbread rises less in the oven and comes out heavy instead of light and tender.
Pouring in hot melted butter straight from the pan can partially cook the egg in the bowl. Little bits of egg set before baking and don’t blend into the batter, leaving rubbery specks and an uneven texture in the finished cornbread.
Skipping the 10-minute rest in the pan often leads to messy slices. The bread is still setting and steaming inside right out of the oven, so cutting too soon makes it break apart and crumble instead of holding clean, neat squares.
Equipment Used:
Ingredients
- 1 cup all-purpose flour
- 1 cup yellow cornmeal
- 1/4 cup granulated sugar
- 1 tbsp baking powder
- 1/2 tsp salt
- 1 cup buttermilk
- 1/4 cup honey
- 1/4 cup unsalted butter, melted
- 1 large egg
Step-by-step Instructions
- 1. Preheat your oven to 400°F (200°C). Grease an 8-inch square baking dish.
- 2. In a large bowl, whisk together the flour, cornmeal, sugar, baking powder, and salt.
- 3. In another bowl, mix the buttermilk, honey, melted butter, and egg until well combined.
- 4. Pour the wet ingredients into the dry ingredients and stir just until moistened.
- 5. Transfer the batter to the prepared baking dish and smooth the top with a spatula.
- 6. Bake for 20 to 25 minutes, or until a toothpick inserted into the center comes out clean.
- 7. Let the corn bread cool in the pan for 10 minutes before slicing and serving.
Trending Now

Classic Cucumber Salad
A refreshing and light cucumber salad featuring crisp cucumbers and a tangy vinaig...
View Recipe
Zesty Summer Squash Casserole
This delightful summer squash casserole combines vibrant garden-fresh vegetables w...
View Recipe
Classic Banana Bread
Classic Banana Bread is a timeless dessert beloved for its moist texture and sweet...
View Recipe
Traditional Dump Cake
Discover the timeless delight of the Traditional Dump Cake, a simple and scrumptio...
View RecipeFrequently Asked Questions
- Can I use white cornmeal instead of yellow?
- Yes, white cornmeal works, though it will slightly alter the flavor and color.
- Can I make this recipe gluten-free?
- Absolutely! Substitute the all-purpose flour with a gluten-free flour blend designed for baking.
- How should I store leftovers?
- Store any leftovers in an airtight container at room temperature for up to 2 days, or refrigerate for up to a week.
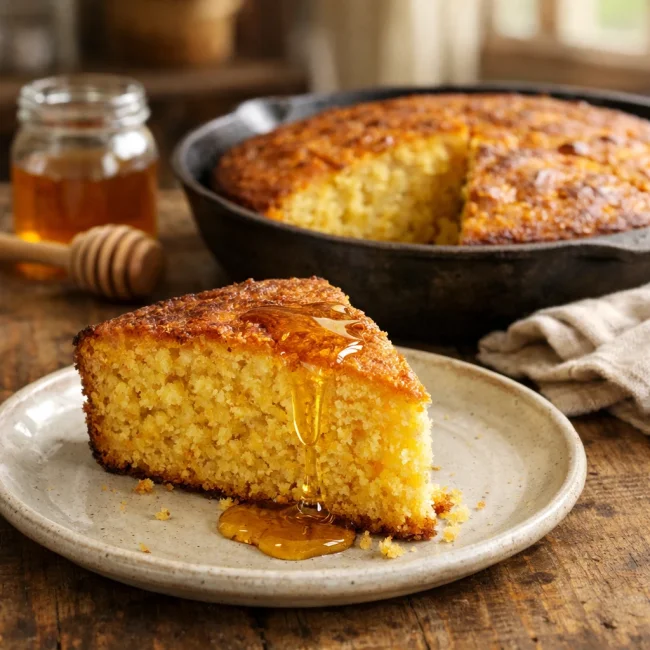
Serving Ideas for Wholesome Honey Corn Bread
This corn bread pairs wonderfully with hearty dishes like chili or barbecue ribs. For a lighter option, try it alongside a fresh salad. A drizzle of extra honey or a pat of butter on top when serving can enhance its flavor even more.
More Southern (U.S.), Breads & Baked Goods Recipes
Wholesome Honey Corn Bread
A delightful twist on classic corn bread, this wholesome honey version combines sw...
View Recipe