Vintage Sugar Cookie Icing
Vintage Sugar Cookie Icing is your go-to for turning simple cookies into eye-catching treats. With just a handful of ingredients, this icing strikes the perfect balance between sweet and smooth. Perfect for any occasion, especially when you want your desserts to look as good as they taste.

This post may contain affiliate links. As an Amazon Associate, we earn from qualifying purchases.
Ingredients for Vintage Sugar Cookie Icing
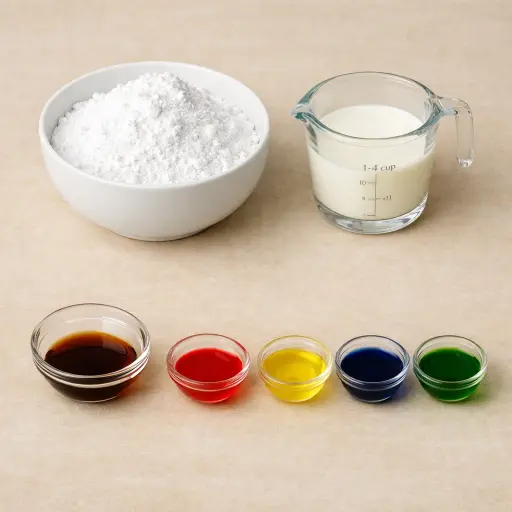
Confectioners' sugar is the star of this icing, providing the perfect sweetness and a smooth texture. Milk helps to dissolve the sugar and achieve the right consistency, making the icing spreadable yet firm enough to set nicely. A touch of vanilla extract adds a hint of mellow flavor, elevating the taste of the icing without overpowering it. Finally, food coloring is optional but lets you personalize your cookies for any event or theme.
Why This Vintage Sugar Cookie Icing Works
Powdered sugar is very dry and fine, so when the milk is stirred in, the sugar drinks it up fast. At first it looks lumpy and stiff, but with a bit of stirring the sugar breaks down and the whole bowl turns smooth and shiny. The milk loosens the sugar just enough so the icing can be spread or piped, but not so much that it runs all over the cookies.
As the vanilla goes in, it spreads through the icing and evens out the taste in every spoonful. When food coloring is added, it blends easily because the icing is already smooth and a little glossy. Once the icing hits the cookies, the thin layer of moisture from the milk starts to dry on the surface. The top firms up and sets, while the sugar underneath stays a little soft. That way the icing holds its shape on the cookie instead of staying wet or sliding off.
Vintage Sugar Cookie Icing Tips & Tricks
- If your icing is too thick, add more milk, a teaspoon at a time, until you reach your desired consistency.
- To avoid bubbles in your icing, stir gently rather than whipping it vigorously.
- Use gel food coloring for more vibrant hues without altering the moisture balance.
Mistakes To Avoid
Adding too much milk at the start makes the icing runny and thin. Instead of clinging to the cookie, it slides off, pools around the edges, and never really sets, so designs blur together and details disappear.
Dumping all the sugar in without stirring gradually can leave stubborn lumps. Those dry pockets of sugar don’t fully dissolve, so the icing looks bumpy and can clog piping tips, making lines break or come out uneven.
Pouring in a lot of liquid food coloring to get a strong color can throw off the texture. The extra liquid loosens the icing so it doesn’t hold its shape, and lines spread out instead of staying crisp.
Letting the icing sit in the bowl for a long time before using it often leads to a crust forming on top. That dry layer creates little flakes that mix back in and leave rough specks and streaks on what should be a smooth, glossy surface.
Equipment Used:
Ingredients
- 2 cups confectioners' sugar
- 1/4 cup milk
- 1/2 teaspoon vanilla extract
- Food coloring (optional)
Step-by-step Instructions
- 1. In a medium bowl, combine the confectioners' sugar and milk. Stir until smooth.
- 2. Mix in the vanilla extract until fully incorporated.
- 3. If desired, divide the icing into separate bowls and add food coloring to each, stirring until the color is evenly distributed.
- 4. Use immediately to ice sugar cookies, or pour into piping bags for more detailed designs.
Trending Now

Old-Fashioned Bread Pudding
Discover the classic charm of Old-Fashioned Bread Pudding - a timeless dessert com...
View Recipe
Traditional Italian Bruschetta
Experience the authentic taste of Italian bruschetta, a perfect blend of fresh tom...
View Recipe
Classic Green Beans
Discover the timeless delight of Classic Green Beans, a simple yet flavorful side ...
View Recipe
Classic Banana Bread
Classic Banana Bread is a timeless dessert beloved for its moist texture and sweet...
View RecipeFrequently Asked Questions
- Can I make this icing ahead of time?
- Yes, but it's best used fresh. If you need to prepare it in advance, store it in an airtight container in the fridge for up to 2 days. Stir well before using.
- Can I freeze cookies with this icing?
- Freezing iced cookies is possible, though the icing may slightly lose its sheen. Ensure they are completely dry before stacking them between layers of parchment paper in an airtight container.
Serving Ideas for Vintage Sugar Cookie Icing
Pair these beautifully iced sugar cookies with a platter of fresh fruit or a scoop of vanilla ice cream. They also make a delightful addition to a holiday cookie exchange or as a thoughtful homemade gift, artfully wrapped.
More Desserts Recipes

Rustic Vanilla Peach Cobbler
This rustic vanilla peach cobbler combines a rich, buttery crust with the sweet, v...
View Recipe
Traditional Lemon Curd
A classic, tangy lemon curd that is perfect for enhancing desserts, breakfast dish...
View Recipe
Traditional Cream Cheese Pie
A delightful and timeless dessert, Traditional Cream Cheese Pie offers a rich and ...
View Recipe
Timeless Cream Puff Delight
Indulge in a delectable Timeless Cream Puff Delight, a classic dessert featuring a...
View Recipe