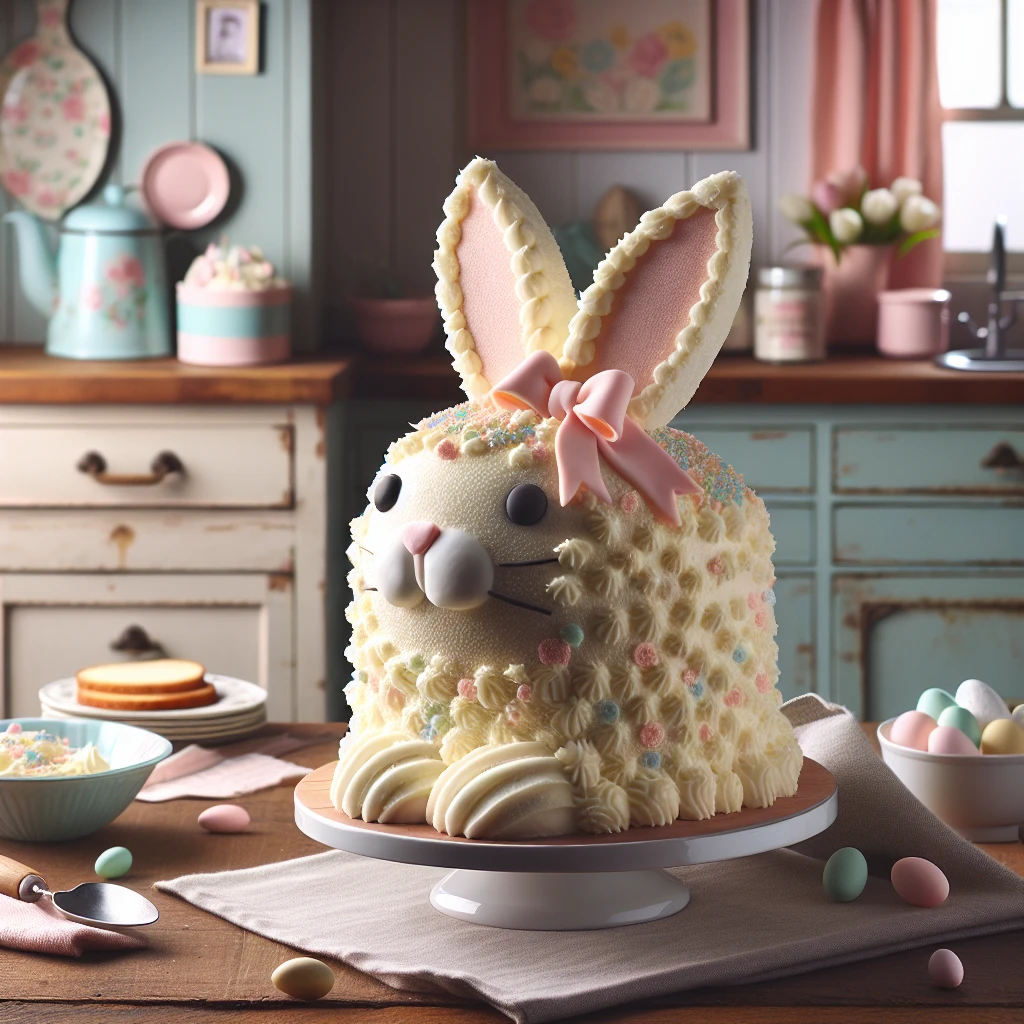
Vintage Easter Bunny Cake
This Vintage Easter Bunny Cake is a delightful way to make your Easter celebrations more special. It's not just a delicious cake; it's a charming centerpiece that brings a touch of nostalgia and whimsy to your table.
This post may contain affiliate links. As an Amazon Associate, we earn from qualifying purchases.
Ingredients for Vintage Easter Bunny Cake
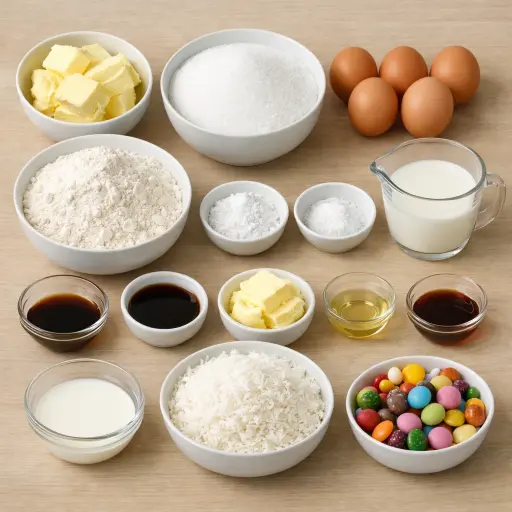
The key to a great cake starts with butter; it makes the cake moist and rich. Granulated sugar sweetens and helps structure the cake. We have eggs for binding and adding fluffiness. A hint of vanilla extract brings a warm aroma and flavor. The all-purpose flour forms the cake's foundation, working with baking powder to provide rise. A touch of salt enhances all the flavors. Whole milk adds moisture and tenderness. For the frosting, powdered sugar gives smooth sweetness, while coconut adds a fun texture and flavor. Finally, assorted candies allow for creative decoration.
Why This Vintage Easter Bunny Cake Works
In the oven, the butter, sugar, eggs, and flour change from a loose batter into a cake that can be cut and moved around. As the batter heats, the baking powder starts to puff up and fill the cake with tiny air pockets. At the same time, the eggs and flour set around those bubbles and hold them in place, so the cake stays light instead of sinking. The milk keeps the crumb soft so it doesn’t dry out while it bakes.
After baking, cooling lets the cake firm up enough to cut into ears and a bowtie without crumbling. During this time, the butter in the cake goes from warm and soft to steady and solid, so the pieces keep their shape. When the buttercream goes on, it acts like glue. The frosting sticks the bunny pieces to the platter and gives the shredded coconut something to grab onto. The coconut presses into the soft frosting and stays put, so the “fur” holds together even when the cake is sliced.
Vintage Easter Bunny Cake Tips & Tricks
- Ensure your butter is well softened for easier mixing and a smoother batter.
- Use room temperature eggs to help the batter emulsify better, resulting in a lighter cake.
- Chill your cake briefly after frosting to help the coconut adhere better.
Mistakes To Avoid
Pulling the cakes from the oven too early leaves the centers soft and underdone, so the layers sag or collapse when moved. Once cut into ear and bowtie shapes, these weak pieces can crack or break apart, making it hard to form a clean bunny shape.
On the other hand, baking the cakes too long dries them out, especially at the edges. When those dry layers are cut into shapes, the edges crumble and shed crumbs everywhere, which makes frosting smooth surfaces and sharp bunny ears almost impossible.
Skipping the full cooling time before cutting and frosting causes trouble fast. Warm cake lets the buttercream melt and slide, so the pieces shift on the platter, the bunny shape loses its outline, and the coconut won’t stick evenly.
Overbeating the cake batter after adding the flour and milk makes the texture tight and heavy. Instead of a soft, easy-to-cut sponge, the cake turns dense, and the shaped pieces can feel thick and bready rather than light.
Equipment Used:
Ingredients
- 1 cup unsalted butter, softened
- 2 cups granulated sugar
- 4 large eggs
- 1 tablespoon vanilla extract
- 3 cups all-purpose flour
- 1 tablespoon baking powder
- 1/2 teaspoon salt
- 1 cup whole milk
- 3 cups powdered sugar
- 1/2 cup unsalted butter, softened
- 1 teaspoon vanilla extract
- 2 tablespoons whole milk
- 2 cups shredded coconut
- Assorted candies for decoration
Step-by-step Instructions
- 1. Preheat your oven to 350°F. Grease and flour two 8-inch round cake pans.
- 2. In a large bowl, cream together 1 cup of butter and granulated sugar until light and fluffy.
- 3. Add eggs one at a time, beating well after each addition, then stir in 1 tablespoon of vanilla extract.
- 4. In another bowl, whisk together flour, baking powder, and salt. Gradually add the dry ingredients to the creamed mixture alternately with milk, beating well after each addition.
- 5. Divide the batter between the prepared pans. Bake for 25-30 minutes or until a toothpick inserted into the center comes out clean. Cool in the pans for 10 minutes, then turn out onto wire racks to cool completely.
- 6. To make the frosting, beat together powdered sugar, 1/2 cup of butter, 1 teaspoon of vanilla extract, and 2 tablespoons of milk until smooth and fluffy.
- 7. Once the cakes are cool, cut one cake into two ears and a bowtie shape. Arrange the pieces to form a bunny shape on a large serving platter.
- 8. Frost the entire cake with the buttercream frosting, then press coconut into the frosting to create a furry texture.
- 9. Decorate with assorted candies to create a face and add any additional Easter-themed decorations as desired.
Trending Now

Classic Banana Bread
Classic Banana Bread is a timeless dessert beloved for its moist texture and sweet...
View Recipe
Classic Cucumber Salad
A refreshing and light cucumber salad featuring crisp cucumbers and a tangy vinaig...
View Recipe
Zesty Summer Squash Casserole
This delightful summer squash casserole combines vibrant garden-fresh vegetables w...
View Recipe
Traditional Dump Cake
Discover the timeless delight of the Traditional Dump Cake, a simple and scrumptio...
View RecipeFrequently Asked Questions
- Can I make this cake in advance?
- Yes, you can bake the cakes a day ahead and wrap them tightly in plastic wrap. Frost and decorate them on the day of serving.
- What if I don't have round cake pans?
- You can use square pans and cut the shapes freehand, though it might be a bit more challenging.
Serving Ideas for Vintage Easter Bunny Cake
This cake pairs wonderfully with a light, fruity tea or a refreshing lemonade. It's a perfect addition to an Easter brunch spread alongside fresh fruit and savory quiches.
More Desserts Recipes

Rustic Vanilla Peach Cobbler
This rustic vanilla peach cobbler combines a rich, buttery crust with the sweet, v...
View Recipe
Traditional Lemon Curd
A classic, tangy lemon curd that is perfect for enhancing desserts, breakfast dish...
View Recipe
Traditional Cream Cheese Pie
A delightful and timeless dessert, Traditional Cream Cheese Pie offers a rich and ...
View Recipe
Timeless Cream Puff Delight
Indulge in a delectable Timeless Cream Puff Delight, a classic dessert featuring a...
View Recipe