Traditional Whipped Cream
If you're looking for a simple, classic whipped cream recipe that's perfect for topping just about anything, you've come to the right place. This traditional whipped cream is three ingredients away from transforming your desserts into something truly special.

This post may contain affiliate links. As an Amazon Associate, we earn from qualifying purchases.
Ingredients for Traditional Whipped Cream
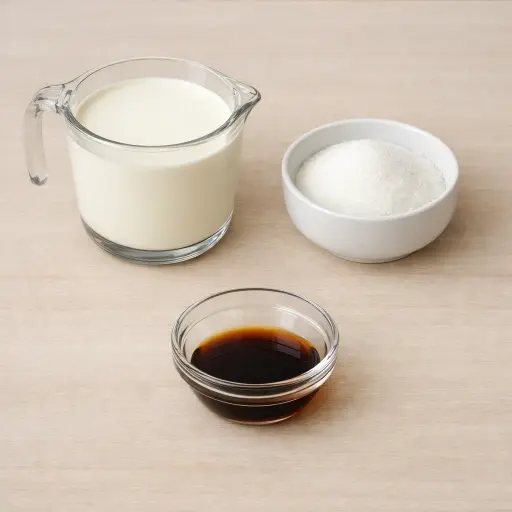
Heavy cream: This is the base of your whipped cream. Its high-fat content is what allows it to whip up into soft, fluffy peaks.
Granulated sugar: Adds just the right amount of sweetness without overpowering the cream's natural richness.
Vanilla extract: Infuses the whipped cream with a subtle, aromatic flavor that complements a wide range of desserts.
Why This Traditional Whipped Cream Works
Chilling the bowl and beaters means the heavy cream stays cold while it is beaten. Cold cream holds tiny bubbles better, so as the mixer runs, air gets whipped into the cream instead of slipping back out. At first the cream just looks foamy, but as more air goes in, the fat in the cream starts to grab onto those bubbles and hold them in place. That is when the cream starts to thicken and look like it has some body.
Once the sugar and vanilla go in, they spread through the cream while it is already starting to thicken. The sugar dissolves into the liquid in the cream, so it sweetens evenly and also makes the whipped cream a bit more stable. Beating on high at the end pushes in even more air until soft peaks form. At that stage, the cream stands up when lifted but still looks smooth and soft, so it is easy to spoon or pipe without sliding all over the place.
Traditional Whipped Cream Tips & Tricks
- Use cold tools and cream for the best results. The colder everything is, the quicker and easier it is to whip up.
- For extra stability, add a tablespoon of powdered sugar in place of some granulated sugar.
- Don't walk away while beating; it can go from perfect to over-whipped in seconds.
Mistakes To Avoid
Beating the cream for too long turns it from smooth and fluffy into grainy and clumpy. As the mixer keeps going, the fat starts to separate from the liquid and the mixture looks a bit like tiny butter bits in milk. The final whipped cream then feels rough in the mouth and doesn’t sit in soft, cloud-like peaks.
Starting with warm cream or a warm bowl keeps the cream from thickening properly. Instead of trapping air and building volume, the cream just sloshes around and stays runny for a long time. The result is a loose mixture that won’t hold peaks and quickly sinks on desserts.
Adding the sugar at the very beginning can slow down the thickening. The crystals pull some moisture and the cream takes longer to whip, so it often gets overbeaten while someone waits for it to firm up. This can leave the whipped cream less stable and closer to that slightly curdled stage.
Equipment Used:
Electric mixer, Mixing bowl, Measuring cups, Measuring spoons
Ingredients
- 2 cups heavy cream
- 2 tablespoons granulated sugar
- 1 teaspoon vanilla extract
Step-by-step Instructions
- 1. Chill the mixing bowl and beaters in the refrigerator for 15 minutes.
- 2. Pour the heavy cream into the chilled bowl.
- 3. Begin beating the cream with an electric mixer on medium speed until it starts to thicken.
- 4. Add granulated sugar and vanilla extract to the cream.
- 5. Continue beating on high speed until soft peaks form.
Trending Now

Old-Fashioned Bread Pudding
Discover the classic charm of Old-Fashioned Bread Pudding - a timeless dessert com...
View Recipe
Traditional Italian Bruschetta
Experience the authentic taste of Italian bruschetta, a perfect blend of fresh tom...
View Recipe
Classic Green Beans
Discover the timeless delight of Classic Green Beans, a simple yet flavorful side ...
View Recipe
Classic Banana Bread
Classic Banana Bread is a timeless dessert beloved for its moist texture and sweet...
View RecipeFrequently Asked Questions
- What if I over-whip the cream?
- If you've beaten it a bit too much and it looks grainy, try folding in a little more liquid cream to smooth it out.
- Can I make this ahead of time?
- Yes, you can make it a few hours in advance. Just give it a quick whip by hand to bring it back to life before serving.
Serving Ideas for Traditional Whipped Cream
Serve this whipped cream over a fresh fruit salad for a refreshing dessert, or dollop it on top of a warm slice of pie. It's also fantastic with a hot cup of cocoa or layered inside a trifle.
More Desserts Recipes

Rustic Vanilla Peach Cobbler
This rustic vanilla peach cobbler combines a rich, buttery crust with the sweet, v...
View Recipe
Traditional Lemon Curd
A classic, tangy lemon curd that is perfect for enhancing desserts, breakfast dish...
View Recipe
Traditional Cream Cheese Pie
A delightful and timeless dessert, Traditional Cream Cheese Pie offers a rich and ...
View Recipe
Timeless Cream Puff Delight
Indulge in a delectable Timeless Cream Puff Delight, a classic dessert featuring a...
View Recipe