Traditional Succulent Oven Beef Ribs
Get ready to indulge in a feast of flavors with these Traditional Succulent Oven Beef Ribs. Perfectly seasoned and slow-cooked to tender perfection, this recipe will elevate your dinner game with minimal effort. Whether it's a casual family dinner or a special occasion, these ribs are sure to impress.

This post may contain affiliate links. As an Amazon Associate, we earn from qualifying purchases.
Ingredients for Traditional Succulent Oven Beef Ribs
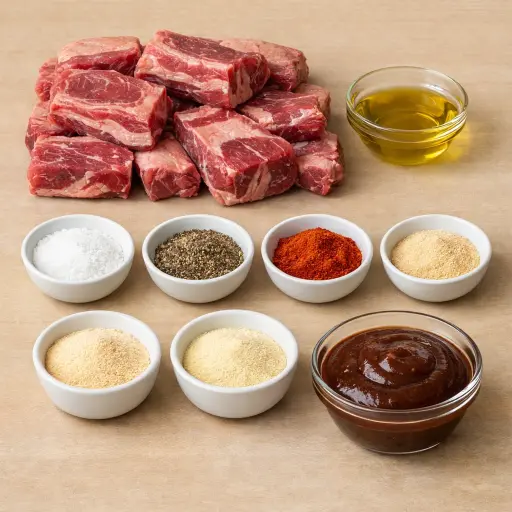
Beef ribs: The star of the show, these ribs provide robust flavor and a satisfying bite. Make sure you choose ribs with a good amount of meat on them.
Olive oil: This helps the spices adhere to the ribs and adds a touch of richness.
Salt and ground black pepper: Essentials for enhancing flavor and balancing the sweetness of the barbecue sauce.
Smoked paprika: Adds a smoky depth without the need for a smoker.
Garlic powder and onion powder: These provide aromatic, savory notes that complement the natural flavor of the beef.
Barbecue sauce: Choose your favorite kind to glaze the ribs, adding a sweet and tangy finish.
Why This Traditional Succulent Oven Beef Ribs Works
In the oven, the ribs sit in low, steady heat for a long time. Wrapped tightly in foil, their own juices stay trapped around the meat instead of drying out in the hot air. Over those three hours, the tough connective tissue in the ribs slowly softens and starts to melt. As that breaks down, the meat loosens from the bone and becomes tender instead of chewy. The spice rub and olive oil mix with the juices inside the foil, so the outside of the ribs stays coated and moist.
After the foil comes off, the ribs are already soft, so they only need higher heat for a short time. The barbecue sauce sticks to the surface and thickens in the hotter oven. The sugars in the sauce darken and form a sticky, slightly chewy layer on top. By the time they rest on the counter, the juices settle back into the meat, so the ribs stay moist when sliced or pulled apart.
Traditional Succulent Oven Beef Ribs Tips & Tricks
- Use heavy-duty aluminum foil to prevent any leaks during cooking.
- If you like your ribs with a little extra kick, add a pinch of cayenne pepper to the spice mix.
- For an extra smoky flavor, you can add a few drops of liquid smoke to the barbecue sauce before brushing.
- Letting the ribs rest after cooking is crucial for juicy meat, so don't skip this step.
Mistakes To Avoid
Cranking the oven hotter than 300°F to “speed things up” makes the outside of the ribs tighten and dry out while the inside stays tougher. Instead of the meat slowly loosening from the bone, the connective tissue doesn’t have time to soften, so the ribs come out chewy instead of tender.
Wrapping the ribs loosely in foil or leaving gaps lets steam escape and dries the meat. Without that trapped moisture, the fat doesn’t slowly melt into the meat, so the ribs shrink, the surface gets tough, and the bones don’t pull cleanly.
Pulling the ribs out of the oven before the meat actually pulls away from the bone leaves them underdone. The connective tissue stays firm, so slicing or biting into them feels stringy and resistant instead of soft and juicy.
Skipping the rest at the end sends all the hot juices rushing out as soon as the ribs are cut. The meat then looks wet on the cutting board but feels noticeably drier and more fibrous on the plate.
Equipment Used:
Ingredients
- 4 lbs beef ribs
- 2 tbsp olive oil
- 1 tbsp salt
- 1 tbsp ground black pepper
- 1 tbsp smoked paprika
- 1 tbsp garlic powder
- 1 tbsp onion powder
- 1 cup barbecue sauce
Step-by-step Instructions
- 1. Preheat your oven to 300°F.
- 2. In a small bowl, mix together salt, pepper, smoked paprika, garlic powder, and onion powder.
- 3. Rub the spice mixture generously over both sides of the ribs.
- 4. Drizzle olive oil over the ribs and rub to coat evenly.
- 5. Wrap the ribs tightly in aluminum foil and place on a baking sheet.
- 6. Bake in the preheated oven for 3 hours, or until the meat is tender and pulls away from the bone easily.
- 7. Unwrap the ribs and brush with barbecue sauce.
- 8. Increase oven temperature to 400°F and return ribs to the oven, uncovered, for 15 minutes to caramelize the sauce.
- 9. Remove from the oven, let rest for 10 minutes, and serve.
Trending Now

Old-Fashioned Bread Pudding
Discover the classic charm of Old-Fashioned Bread Pudding - a timeless dessert com...
View Recipe
Traditional Italian Bruschetta
Experience the authentic taste of Italian bruschetta, a perfect blend of fresh tom...
View Recipe
Classic Banana Bread
Classic Banana Bread is a timeless dessert beloved for its moist texture and sweet...
View Recipe
Classic Green Beans
Discover the timeless delight of Classic Green Beans, a simple yet flavorful side ...
View RecipeFrequently Asked Questions
- Can I use a different type of rib?
- Yes, you can use pork ribs, but adjust the cooking time as they may require less time in the oven.
- What if I don’t have smoked paprika?
- You can substitute regular paprika, though you will miss out on the smoky flavor. Adding a dash of liquid smoke can help replicate it.
- How do I know when the ribs are done?
- The meat should be tender and pull away from the bone easily. If they're not quite there, give them a bit more time in the oven.
Serving Ideas for Traditional Succulent Oven Beef Ribs
These ribs go wonderfully with classic sides like coleslaw, cornbread, or roasted vegetables. For a lighter option, try serving them with a fresh green salad. If you're feeling indulgent, a side of creamy mashed potatoes will complement the rich flavors beautifully.
More Grilling & BBQ Recipes
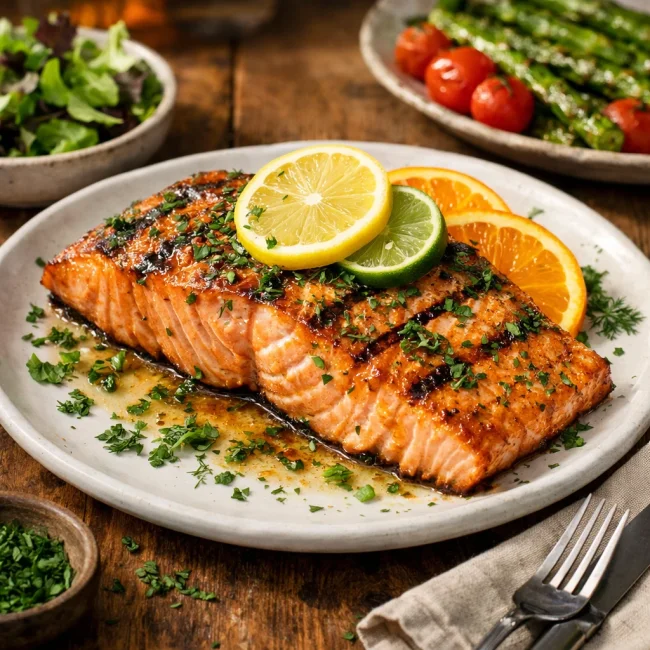
Citrus Herb Grilled Salmon
Discover the burst of flavors in our Citrus Herb Grilled Salmon recipe. This delig...
View Recipe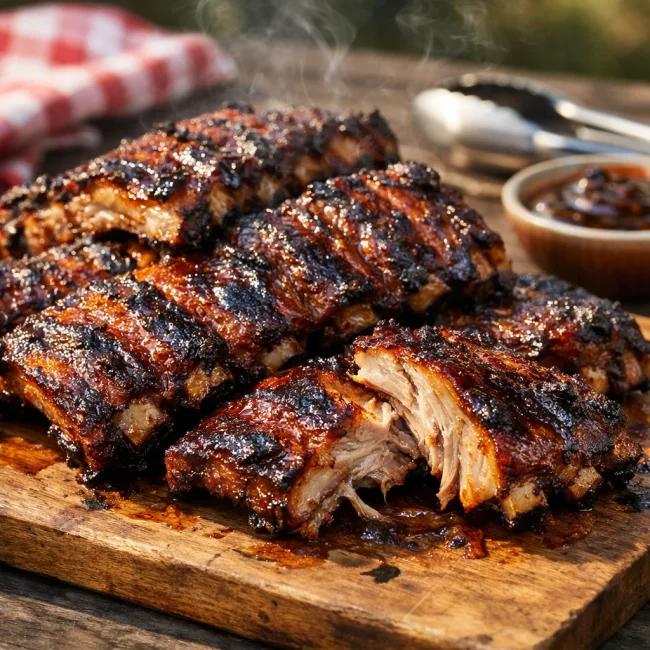
Smoky Maple Bourbon Baby Back Ribs
Savor the taste of summer with our Smoky Maple Bourbon Baby Back Ribs recipe, infu...
View Recipe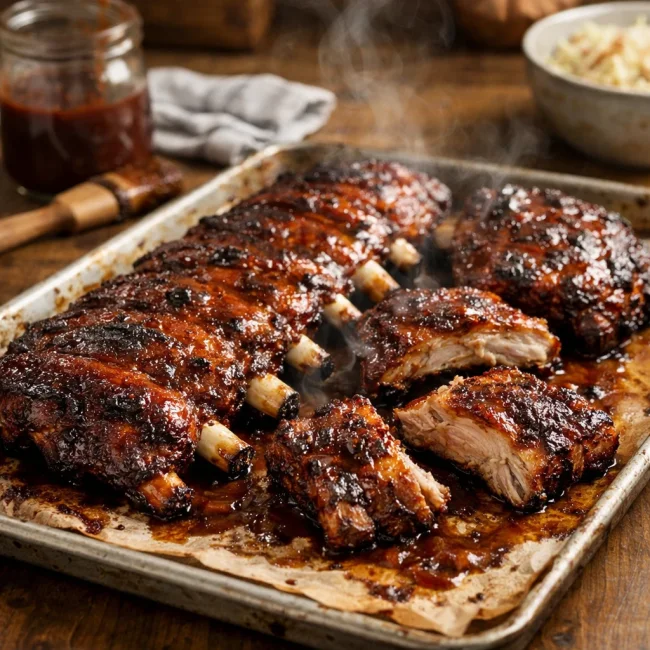
Oven-Baked BBQ Ribs
Enjoy tender ribs with a smoky BBQ sauce, slow-cooked in the oven for that fall-of...
View Recipe
Cilantro Mint Chimichurri
A zesty variation of the classic chimichurri, featuring vibrant cilantro and refre...
View Recipe