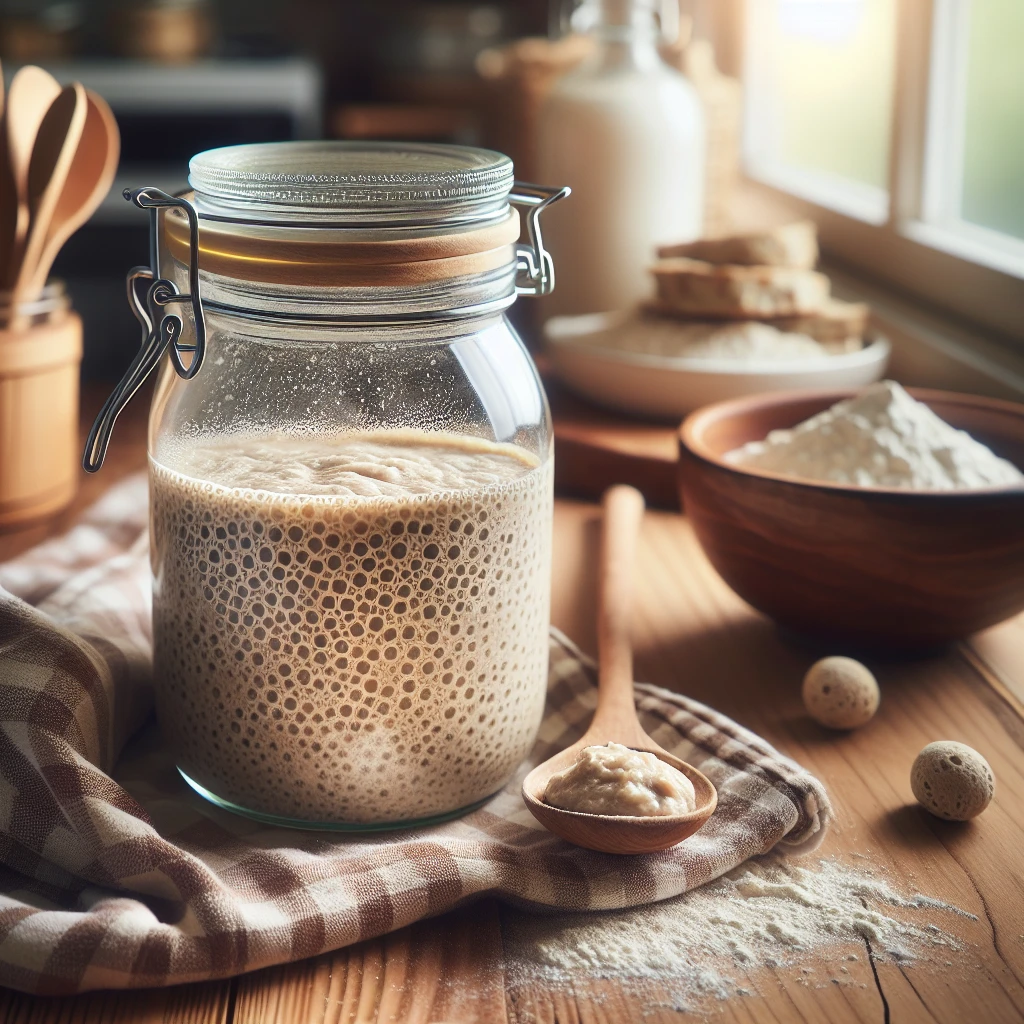
Traditional Sourdough Starter
Creating your own Traditional Sourdough Starter is like inviting a timeless culinary tradition into your kitchen. It’s not just about the end product but the joy of cultivating something from scratch that will enhance your baking adventures.
This post may contain affiliate links. As an Amazon Associate, we earn from qualifying purchases.
Ingredients for Traditional Sourdough Starter
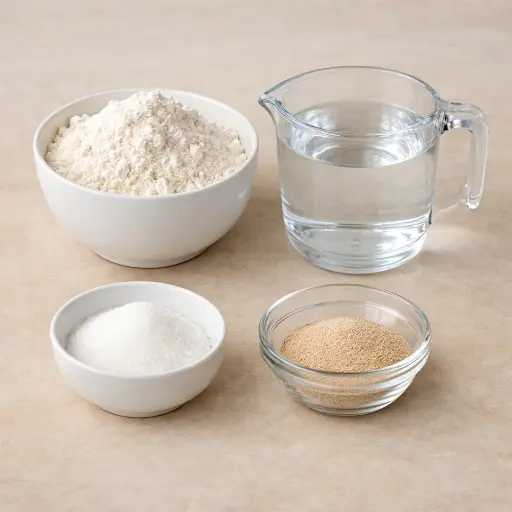
The base of this starter is all-purpose flour. It provides the necessary starches that the yeast feeds on to grow. Warm water helps to activate the yeast, creating a hospitable environment for fermentation. A touch of sugar gives the yeast an initial boost, helping it to become active more quickly. The active dry yeast is the magic ingredient that kickstarts the fermentation process, leading to that tangy, characteristic sourdough flavor.
Why This Traditional Sourdough Starter Works
The starter turns out well because the yeast gets steady food and time to grow. At the start, the warm water wakes up the dry yeast so it starts to come alive and feed. Sugar gives the yeast something easy to eat right away, so it starts bubbling faster. As the days go by, the yeast starts eating the flour too. That slow eating makes gas and a little acid, which is what gives the starter its bubbles and tangy smell.
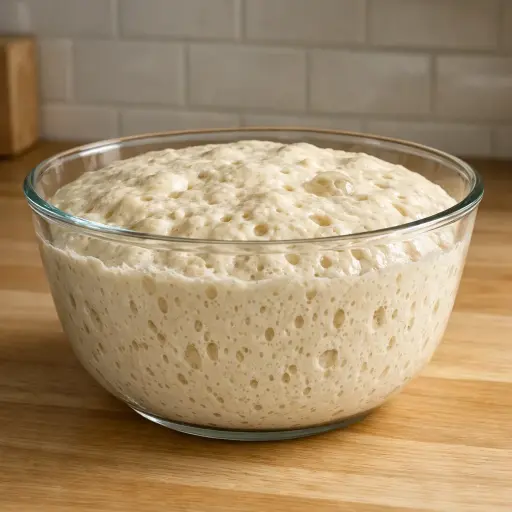
Stirring every day spreads the yeast through the flour and water so it grows evenly instead of sitting in one spot. Throwing away half and adding fresh flour and warm water keeps the yeast from running out of food. It also keeps the mix from getting too thick or too sour. Over five days, the bowl slowly changes from a flat paste into a puffy, bubbly starter that can lift bread dough on its own.
Traditional Sourdough Starter Tips & Tricks
- Keep your starter in a warm spot, like on top of the fridge, to encourage fermentation.
- If your starter doesn’t seem active by day three, give it a gentle stir to redistribute the yeast.
- Ensure your utensils and bowl are clean to prevent any unwanted bacteria from affecting your starter.
Mistakes To Avoid
Using water that is too hot can quietly kill the yeast right at the start. The mixture then just sits there, looking like paste, with no bubbles or rise over the next days, and the starter never becomes active enough to lift bread dough.
Adding way more flour or water than listed throws off the thickness of the starter. When it’s too thick, bubbles struggle to move through it and it looks dead; when it’s too runny, the yeast and flour stay weak and the starter never builds a strong, stretchy texture.
Covering the bowl with something airtight, like a tight lid or plastic wrap pressed down, traps gases and limits air flow. The starter can build sharp smells and odd colors instead of a steady, mild tang, and may stop bubbling well.
Skipping the daily discard and feed means the bowl just fills with old, tired starter. The yeast gets crowded and runs out of fresh food, so activity slows down, the surface looks flat and sluggish, and the final starter stays weak and unreliable for baking.
Equipment Used:
Glass or plastic bowl, Measuring cups, Stirring spoon, Clean cloth
Ingredients
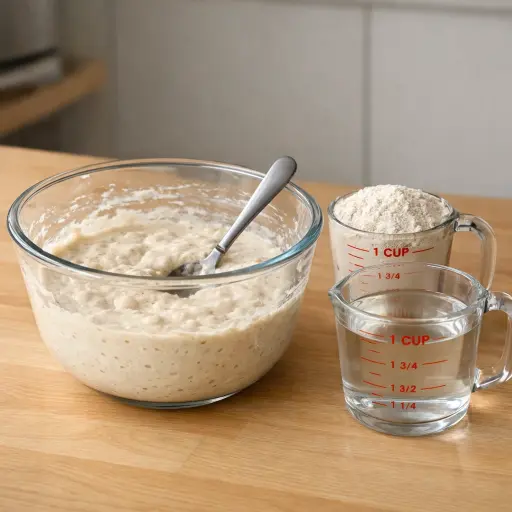
- 2 cups all-purpose flour
- 2 cups warm water
- 1 tablespoon sugar
- 1 tablespoon active dry yeast
Step-by-step Instructions
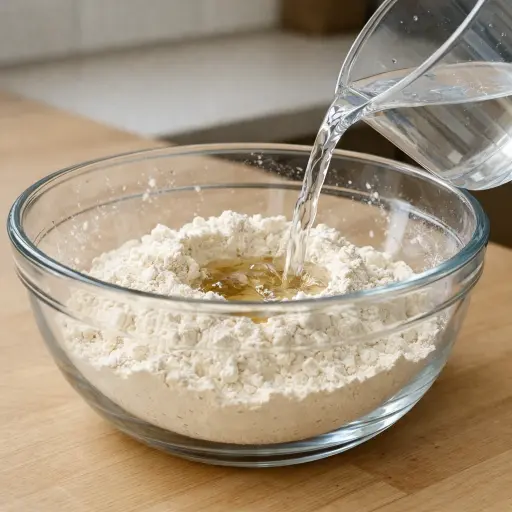
- 1. In a large glass or plastic bowl, combine the flour and warm water.
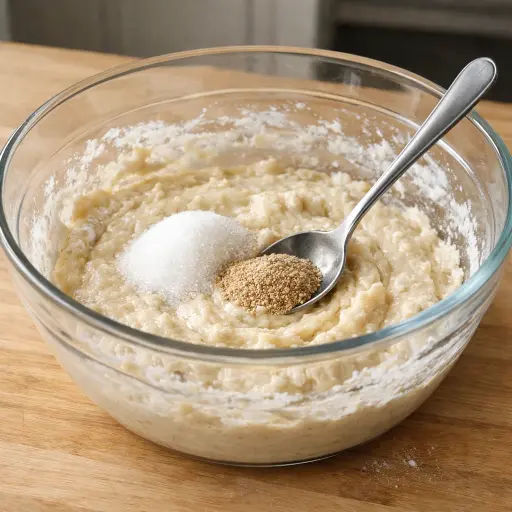
- 2. Stir in the sugar and active dry yeast until fully dissolved.
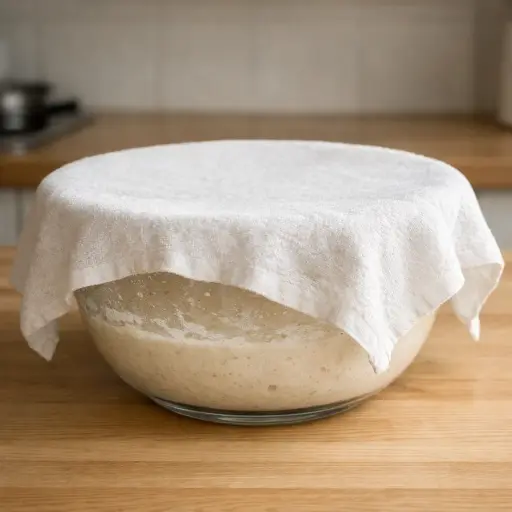
- 3. Cover the bowl with a clean, damp cloth and let it sit at room temperature for 24 hours.
- 4. Stir the starter once daily for 5 consecutive days, discarding half of the starter each time and replenishing with 1 cup of flour and 1 cup of warm water.
- 5. After 5 days, the starter should be bubbly and have a tangy aroma, indicating it is ready for use.
Trending Now

Old-Fashioned Bread Pudding
Discover the classic charm of Old-Fashioned Bread Pudding - a timeless dessert com...
View Recipe
Traditional Italian Bruschetta
Experience the authentic taste of Italian bruschetta, a perfect blend of fresh tom...
View Recipe
Classic Green Beans
Discover the timeless delight of Classic Green Beans, a simple yet flavorful side ...
View Recipe
Classic Banana Bread
Classic Banana Bread is a timeless dessert beloved for its moist texture and sweet...
View RecipeFrequently Asked Questions
- What if my starter isn’t bubbly after five days?
- Give it a couple more days, feeding as usual. Sometimes it takes a bit longer to develop depending on your kitchen environment.
- Can I use whole wheat flour instead?
- Yes, you can substitute some or all of the all-purpose flour with whole wheat flour for a more robust flavor.
Serving Ideas for Traditional Sourdough Starter
Once your starter is ready, use it to bake a classic sourdough loaf that pairs wonderfully with a hearty soup or stew. Slice it for sandwiches, toast it for breakfast with a slather of butter and jam, or use it as a base for homemade bruschetta.
More Breads & Baked Goods Recipes

Traditional Italian Easter Bread
Savor the delightful taste of a classic Italian Easter bread, a sweet, soft, and s...
View Recipe
Old-Fashioned Pineapple Bread
A delightful and flavorful bread infused with juicy pineapple, perfect for breakfa...
View Recipe
Old-Fashioned Blueberry Muffins
Transport yourself to simpler times with these delightful old-fashioned blueberry ...
View Recipe
Strawberry Basil Scones
These tender scones combine the sweetness of fresh strawberries with a hint of pep...
View Recipe