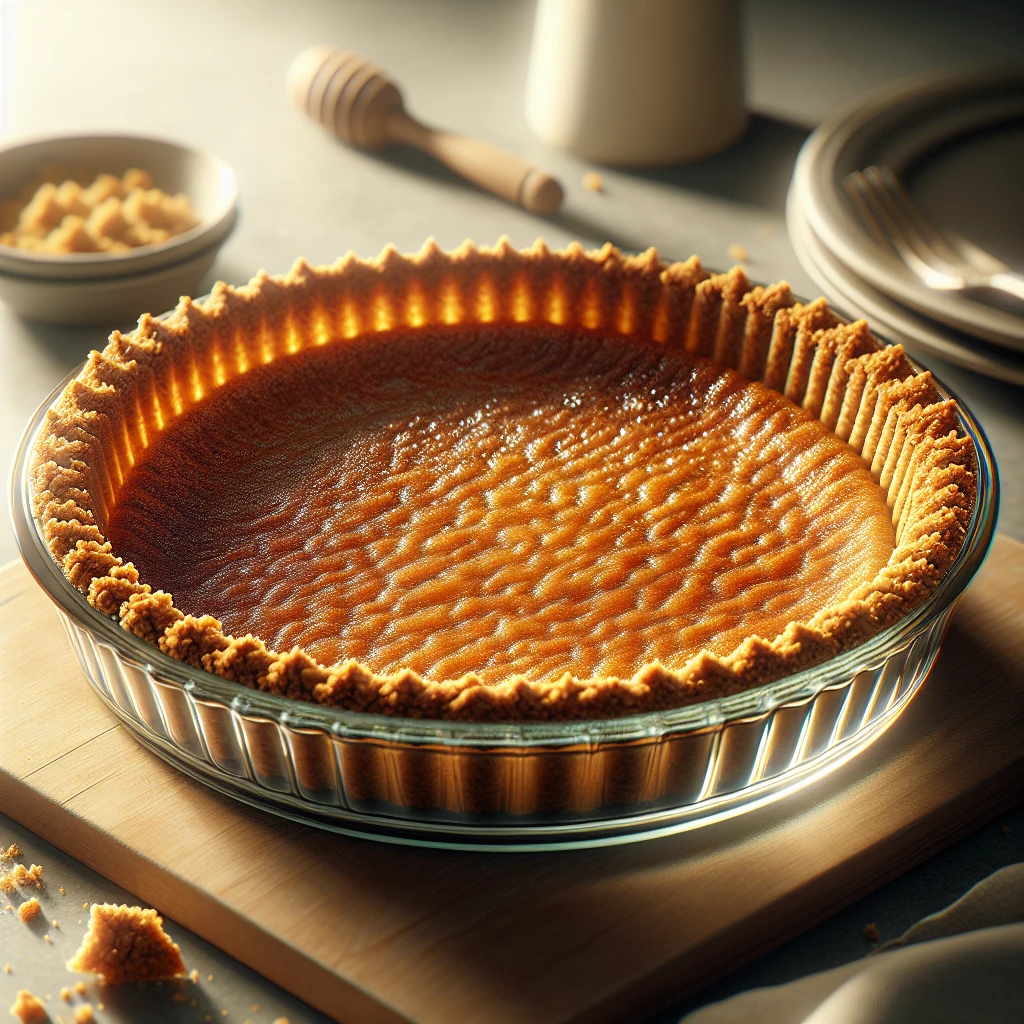
Traditional Graham Cracker Crust
If you’ve ever wanted to make a homemade pie crust but felt intimidated, this graham cracker crust is your ticket to success. It’s simple, reliable, and always a crowd-pleaser. Plus, it adds a delightful crunch and buttery finish to your favorite pies.
This post may contain affiliate links. As an Amazon Associate, we earn from qualifying purchases.
Ingredients for Traditional Graham Cracker Crust
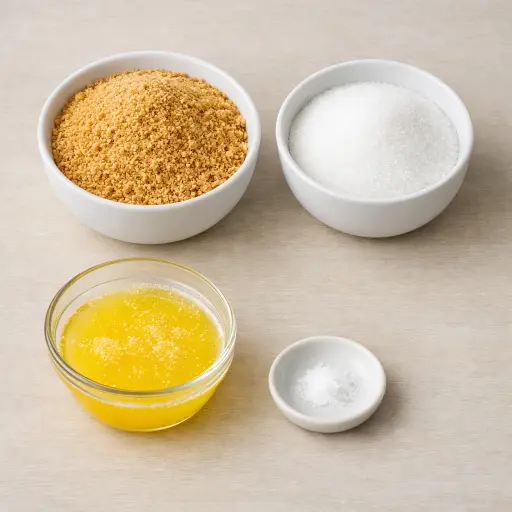
Graham crackers form the base, providing that signature sweet and slightly nutty flavor. Granulated sugar enhances the sweetness and helps bind the crust. Unsalted butter is the hero, adding richness and helping the crust hold together. A pinch of salt balances the sweetness and brings out all the flavors.
Why This Traditional Graham Cracker Crust Works
In the bowl, the crushed graham crackers soak up the melted butter and sugar. Everything starts out loose and sandy, but once the crumbs are coated, they begin to stick to each other instead of falling apart. Pressing the mixture into the pan packs those buttery crumbs tightly, so they stay put instead of sliding around later.
In the oven, the butter melts again and runs through the crumbs, then firms back up as it cools. During baking, the sugar also melts a bit and then hardens, which acts like glue between the crumbs. By the time it comes out, the crust has gone from soft and sandy to one solid piece that can hold a heavy filling.
As it cools, the crust finishes setting. The butter goes back to a firm state, the sugar stiffens, and the crumbs stay locked together. That’s why the crust slices cleanly and doesn’t crumble into a pile when a knife goes through it.
Traditional Graham Cracker Crust Tips & Tricks
- For finer crumbs, you can pulse the graham crackers in a food processor.
- Press the crust mixture with the bottom of a measuring cup for an even layer.
- If you’re making a no-bake pie, chill the crust in the fridge to set instead of baking.
Mistakes To Avoid
Packing the crumbs too loosely leaves gaps and air pockets in the crust. In the oven, the butter melts and runs instead of binding the crumbs together, so the crust crumbles apart when sliced and the filling can leak through.
Letting the crust bake too long dries out the butter and sugar at the edges. The result is a hard, tough rim that can be difficult to cut and a bottom that tastes a bit burnt instead of lightly toasty.
Using still-warm melted butter that’s separated, with the clear liquid poured off, throws off the balance. The crumbs soak up mostly fat without enough moisture, so the mixture looks greasy instead of like damp sand and bakes into a patchy, uneven crust.
Skipping the cooling time before adding filling causes trouble, especially with creamy or custard fillings. The heat from the crust softens or partly melts the filling on contact, so it can slide around, soak into the crumbs, and set in a messy, uneven layer.
Equipment Used:
Ingredients
- 1 1/2 cups crushed graham crackers
- 1/3 cup granulated sugar
- 1/2 cup unsalted butter, melted
- Pinch of salt
Step-by-step Instructions
- 1. Preheat your oven to 350°F (175°C).
- 2. In a medium bowl, combine crushed graham crackers, sugar, and salt.
- 3. Add melted butter to the mixture and stir until well combined and resembles wet sand.
- 4. Press the mixture firmly and evenly into the bottom and up the sides of a 9-inch pie pan.
- 5. Bake in the preheated oven for 10 minutes, or until lightly golden brown.
- 6. Remove from oven and let cool completely before adding your desired filling.
Trending Now

Old-Fashioned Bread Pudding
Discover the classic charm of Old-Fashioned Bread Pudding - a timeless dessert com...
View Recipe
Traditional Italian Bruschetta
Experience the authentic taste of Italian bruschetta, a perfect blend of fresh tom...
View Recipe
Classic Banana Bread
Classic Banana Bread is a timeless dessert beloved for its moist texture and sweet...
View Recipe
Classic Green Beans
Discover the timeless delight of Classic Green Beans, a simple yet flavorful side ...
View RecipeFrequently Asked Questions
- Can I use salted butter?
- Yes, but skip the added pinch of salt to avoid over-seasoning.
- How can I make this gluten-free?
- Simply substitute regular graham crackers with gluten-free ones.
- Can I prepare the crust in advance?
- Absolutely! You can make it a day ahead and store it at room temperature, covered.
Serving Ideas for Traditional Graham Cracker Crust
This crust is the perfect base for creamy cheesecakes or tangy lemon pies. For a decadent treat, fill it with chocolate pudding and top with whipped cream. Or, go classic with a key lime filling—it’s a match made in heaven.
More Desserts Recipes

Rustic Vanilla Peach Cobbler
This rustic vanilla peach cobbler combines a rich, buttery crust with the sweet, v...
View Recipe
Traditional Lemon Curd
A classic, tangy lemon curd that is perfect for enhancing desserts, breakfast dish...
View Recipe
Traditional Cream Cheese Pie
A delightful and timeless dessert, Traditional Cream Cheese Pie offers a rich and ...
View Recipe
Timeless Cream Puff Delight
Indulge in a delectable Timeless Cream Puff Delight, a classic dessert featuring a...
View Recipe