Traditional Churned Butter
There’s something incredibly satisfying about making your own butter at home. This traditional churned butter recipe is perfect for those who appreciate the art of homemade, fresh, and natural ingredients. Plus, it’s a great way to connect with culinary traditions and add a personal touch to your meals.

This post may contain affiliate links. As an Amazon Associate, we earn from qualifying purchases.
Ingredients for Traditional Churned Butter
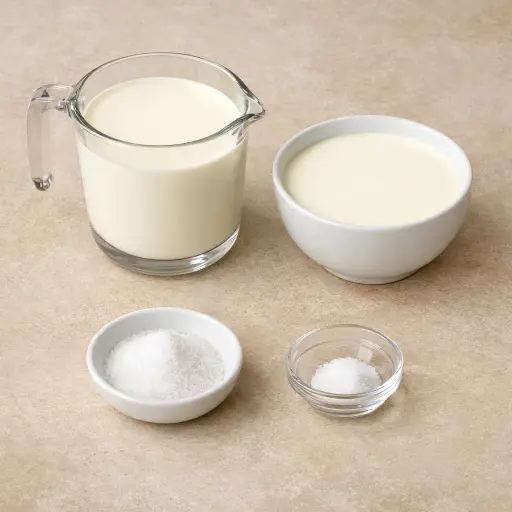
The main star of this recipe is heavy cream. It's the fat content that allows the cream to transform into butter, so make sure to use a cream with a fat content of around 36% or higher. The optional salt is not just for taste; it also acts as a natural preservative, helping your butter last a bit longer in the fridge.
Why This Traditional Churned Butter Works
At first the cream is just liquid, with tiny bits of fat floating around that no one can see. As the mixer beats the cream, those fat bits start bumping into each other over and over. After a while they grab onto each other and form soft whipped cream. Beating past that point, the fat clumps grow bigger and push out the extra liquid. That is when the butter suddenly looks chunky and the buttermilk separates.
Once the buttermilk is strained off, the butter still has some of that liquid hiding inside. Rinsing under cold water and gently kneading squeezes out the last of it. When the water runs clear, most of the buttermilk is gone, so the butter stays firm longer and doesn’t spoil as fast. Salt, if used, spreads through the soft butter while it is still easy to shape, so it tastes even all the way through the block or roll.
Traditional Churned Butter Tips & Tricks
- Make sure the cream is cold; it churns better and more efficiently.
- If you're using a stand mixer, keep an eye on the cream to avoid splattering as it separates.
- For flavored butter, try adding finely chopped herbs or a drizzle of honey during the mixing process.
Mistakes To Avoid
Letting the cream stay too warm before whipping can cause trouble. The fat softens too much, so instead of clean clumps of butter forming, the mixture turns greasy and smeary. The final butter feels oily and loose instead of firm and spreadable.
Stopping the mixer too early leaves the cream at the whipped stage, where it looks thick and fluffy but the fat hasn’t fully separated. The liquid and solids stay mixed, so straining barely removes anything. The result is more like stiff whipped cream than real butter, and it will collapse and melt quickly.
Skipping a good rinse under cold water leaves buttermilk trapped inside the butter. That leftover liquid slowly seeps out and can make the butter soggy and streaky. Over a day or two, it starts to smell off and the butter spoils much faster.
Adding the salt before the butter fully forms can throw off the separation. The grains pull moisture in odd spots, so some areas clump while others stay creamy. The finished butter ends up uneven, with wet pockets and a pasty texture.
Equipment Used:
Ingredients
- 2 cups heavy cream
- 1/4 tsp salt (optional)
Step-by-step Instructions
- 1. Pour the heavy cream into a large mixing bowl.
- 2. Use a hand mixer to whip the cream on medium speed until it becomes thick and the fat separates from the liquid, about 8-10 minutes.
- 3. Once the butter begins to solidify, strain the liquid (buttermilk) using a fine mesh strainer.
- 4. Rinse the butter under cold water to remove any remaining buttermilk, kneading with a spatula or your hands until the water runs clear.
- 5. Mix in salt if desired, and shape the butter into a block or roll for storage.
Trending Now

Classic Cucumber Salad
A refreshing and light cucumber salad featuring crisp cucumbers and a tangy vinaig...
View Recipe
Zesty Summer Squash Casserole
This delightful summer squash casserole combines vibrant garden-fresh vegetables w...
View Recipe
Classic Banana Bread
Classic Banana Bread is a timeless dessert beloved for its moist texture and sweet...
View Recipe
Traditional Dump Cake
Discover the timeless delight of the Traditional Dump Cake, a simple and scrumptio...
View RecipeFrequently Asked Questions
- Can I use a food processor instead of a hand mixer?
- Yes, a food processor can also churn cream into butter. Just be mindful of the speed and duration to avoid over-processing.
- How long does homemade butter last?
- When stored in the fridge, homemade butter can last up to a week. Adding salt can extend its shelf life slightly.
- What can I do with the leftover buttermilk?
- Use it in baking recipes like pancakes, biscuits, or bread for a light and fluffy texture.
Serving Ideas for Traditional Churned Butter
Homemade butter is luxurious on warm, crusty bread, adding a rich, creamy layer that elevates a simple slice. Spread it over pancakes or waffles for breakfast, or melt it over freshly steamed vegetables for a touch of indulgence. You can also use it as a base for sauces or to finish off a perfectly cooked steak.
More Breads & Baked Goods Recipes

Traditional Italian Easter Bread
Savor the delightful taste of a classic Italian Easter bread, a sweet, soft, and s...
View Recipe
Old-Fashioned Pineapple Bread
A delightful and flavorful bread infused with juicy pineapple, perfect for breakfa...
View Recipe
Old-Fashioned Blueberry Muffins
Transport yourself to simpler times with these delightful old-fashioned blueberry ...
View Recipe
Strawberry Basil Scones
These tender scones combine the sweetness of fresh strawberries with a hint of pep...
View Recipe