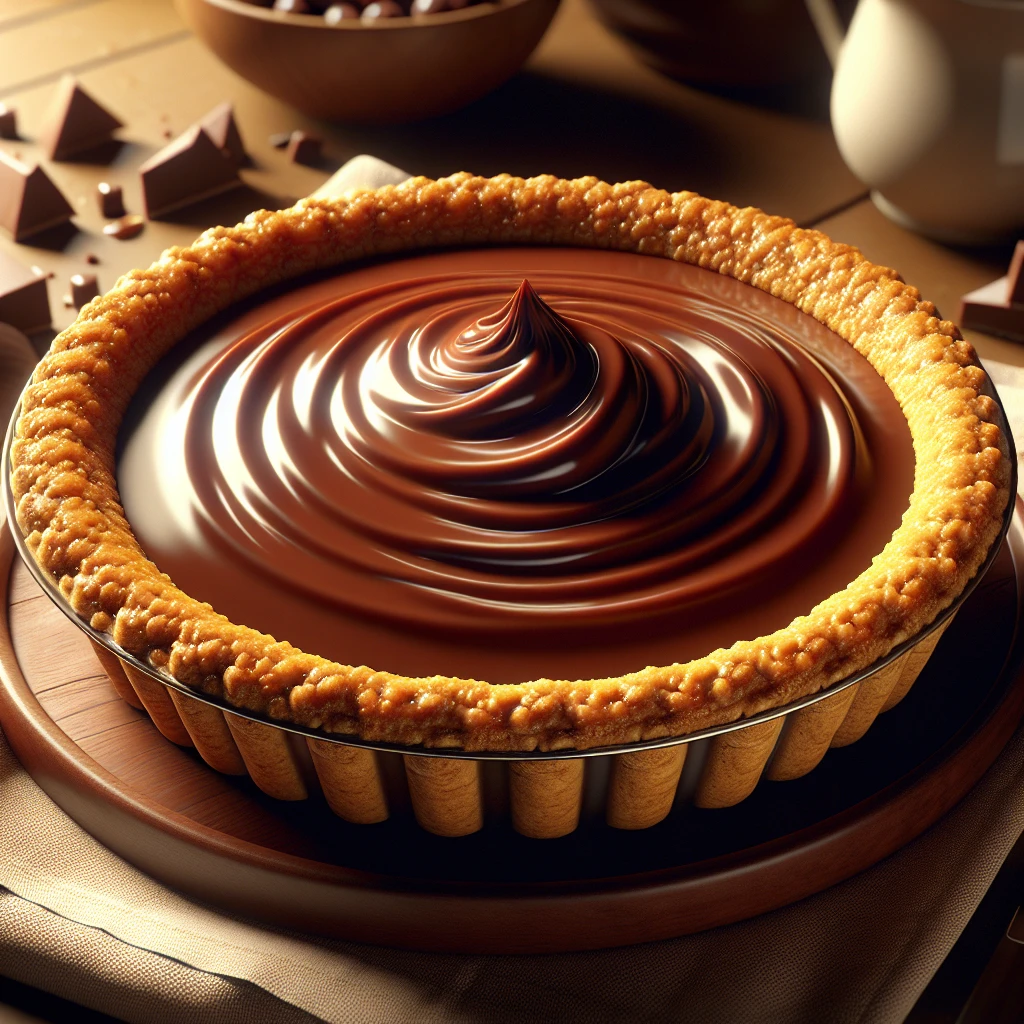
Traditional Chocolate Pudding Pie
If you're craving a dessert that's both comforting and impressive, this Traditional Chocolate Pudding Pie is your answer. With a crunchy graham cracker crust and a rich, velvety chocolate filling, it's perfect for any occasion, from holiday gatherings to weekend indulgences.
This post may contain affiliate links. As an Amazon Associate, we earn from qualifying purchases.
Ingredients for Traditional Chocolate Pudding Pie
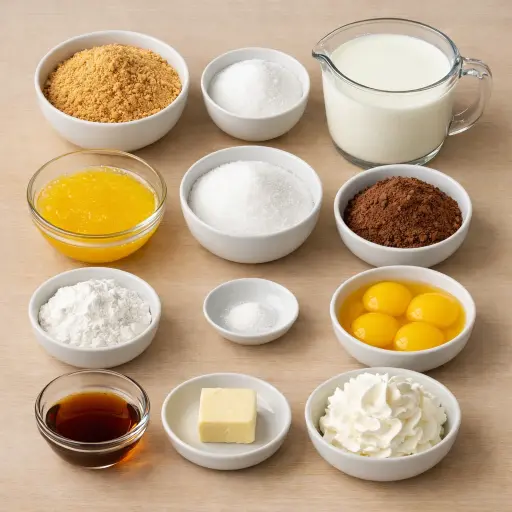
The star of our crust is graham cracker crumbs, which provide a sweet, slightly nutty base. Combined with a bit of granulated sugar for sweetness and unsalted butter to bind it all together, it forms the perfect foundation for our pie.
For the filling, unsweetened cocoa powder gives depth and a true chocolatey vibe. Cornstarch acts as a thickening agent, ensuring that our pudding sets beautifully without being too dense. A pinch of salt enhances all the flavors.
The rich, creamy texture comes from whole milk, which adds a full-bodied flavor. The egg yolks give the pudding its luscious texture and add a touch of richness. Finally, pure vanilla extract and a touch of butter add warmth and smoothness to the finished pudding.
Why This Traditional Chocolate Pudding Pie Works
In the saucepan, the sugar, cocoa, and cornstarch start out dry and powdery. As milk is whisked in and the pan warms up, the cornstarch swells and spreads through the milk. After a few minutes over medium heat, the liquid that was thin like chocolate milk slowly becomes thicker and smoother. Stirring all the time keeps it from clumping or sticking to the bottom, so the pudding stays silky.
Once the hot chocolate mixture is whisked into the egg yolks and then poured back into the pan, the yolks gently cook and firm up the pudding even more. They give it body so it slices cleanly later instead of running all over the plate. Off the heat, butter and vanilla melt in and smooth everything out.
In the oven, the graham cracker crust sets as the butter firms up, so it holds its shape and doesn’t crumble apart. During chilling, the hot pudding cools, the starch and eggs finish setting, and the filling goes from soft and warm to cold, thick, and sliceable inside that crisp crust.
Traditional Chocolate Pudding Pie Tips & Tricks
- For an extra crunchy crust, chill it in the fridge for an additional 30 minutes before adding the filling.
- Use high-quality cocoa powder for the best chocolate flavor.
- Whisk continuously to prevent lumps when cooking the pudding.
Mistakes To Avoid
Letting the pudding mixture boil hard or sit on the heat too long makes the cornstarch break down and the eggs start to scramble. The mixture can look grainy or curdled instead of smooth and glossy. Once this happens, the filling sets up with a rough, lumpy texture instead of a silky one.
Adding the egg yolks straight into the hot pot without tempering causes them to cook in clumps on contact. Little bits of cooked egg end up floating in the pudding, and even whisking hard will not fully smooth it out. The finished pie then has tiny rubbery pieces instead of an even, creamy filling.
Pouring the pudding into a warm or still-soft crust leads to trouble when slicing. The heat can soften the butter in the crust again, so the crumbs slide around instead of holding together. After chilling, the pie may look set but the crust crumbles and separates from the filling.
Skipping the plastic wrap directly on the surface lets a thick skin form on top of the pudding. That skin turns into chewy bits when stirred or when cutting slices. The texture of each slice ends up uneven, with firm patches mixed into the otherwise smooth filling.
Ingredients
- 1 1/2 cups graham cracker crumbs
- 1/4 cup granulated sugar
- 1/2 cup unsalted butter, melted
- 2/3 cup granulated sugar
- 1/3 cup unsweetened cocoa powder
- 1/4 cup cornstarch
- 1/8 teaspoon salt
- 3 cups whole milk
- 4 large egg yolks, beaten
- 2 teaspoons pure vanilla extract
- 1 tablespoon unsalted butter
- Whipped cream, for garnish
- Chocolate shavings, for garnish
Step-by-step Instructions
- 1. Preheat the oven to 350°F (175°C).
- 2. In a medium bowl, combine graham cracker crumbs and 1/4 cup sugar; stir in melted butter until evenly moistened.
- 3. Press the mixture firmly into the bottom and up the sides of a 9-inch pie pan.
- 4. Bake the crust for 10 minutes, then set aside to cool.
- 5. In a large saucepan, whisk together 2/3 cup sugar, cocoa powder, cornstarch, and salt.
- 6. Gradually whisk in milk until smooth; place over medium heat and cook, stirring constantly, until the mixture starts to thicken.
- 7. Temper the egg yolks by slowly adding a small amount of the hot milk mixture into the yolks, whisking continually.
- 8. Return the tempered yolks to the saucepan and cook for another 2-3 minutes until the pudding is thick and glossy.
- 9. Remove from heat and stir in vanilla extract and 1 tablespoon butter until fully incorporated.
- 10. Pour the warm pudding into the prepared crust, smoothing the top with a spatula.
- 11. Cover with plastic wrap directly on the surface to prevent a skin from forming; refrigerate for at least 4 hours or overnight.
- 12. Before serving, garnish with whipped cream and chocolate shavings.
Trending Now

Old-Fashioned Bread Pudding
Discover the classic charm of Old-Fashioned Bread Pudding - a timeless dessert com...
View Recipe
Traditional Italian Bruschetta
Experience the authentic taste of Italian bruschetta, a perfect blend of fresh tom...
View Recipe
Classic Green Beans
Discover the timeless delight of Classic Green Beans, a simple yet flavorful side ...
View Recipe
Classic Banana Bread
Classic Banana Bread is a timeless dessert beloved for its moist texture and sweet...
View RecipeFrequently Asked Questions
- Can I use a different type of crust?
- Absolutely! A chocolate cookie crust would be a delicious alternative.
- How long will this pie last in the fridge?
- Stored properly, it will keep for up to 3 days.
Serving Ideas for Traditional Chocolate Pudding Pie
Top each slice with a dollop of freshly whipped cream and a sprinkle of chocolate shavings. For a more decadent experience, serve with a scoop of vanilla ice cream on the side. This pie pairs beautifully with a glass of cold milk or a cup of rich espresso.
More Desserts Recipes

Rustic Vanilla Peach Cobbler
This rustic vanilla peach cobbler combines a rich, buttery crust with the sweet, v...
View Recipe
Traditional Lemon Curd
A classic, tangy lemon curd that is perfect for enhancing desserts, breakfast dish...
View Recipe
Traditional Cream Cheese Pie
A delightful and timeless dessert, Traditional Cream Cheese Pie offers a rich and ...
View Recipe
Timeless Cream Puff Delight
Indulge in a delectable Timeless Cream Puff Delight, a classic dessert featuring a...
View Recipe