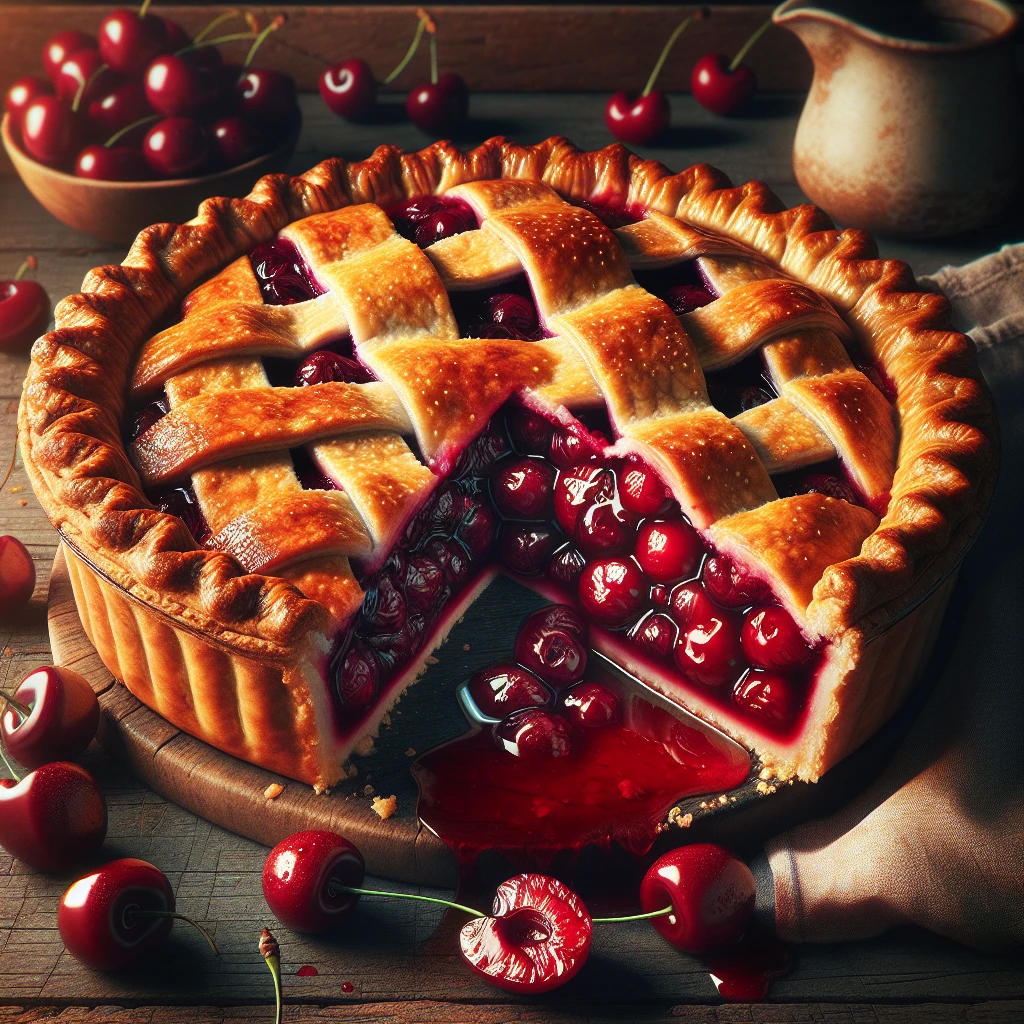
Traditional Cherry Pie
This Traditional Cherry Pie recipe is a classic that never goes out of style. Perfect for summer gatherings or a cozy holiday treat, it combines the perfect balance of tart and sweet. Plus, it's easier to make than you might think!
This post may contain affiliate links. As an Amazon Associate, we earn from qualifying purchases.
Ingredients for Traditional Cherry Pie
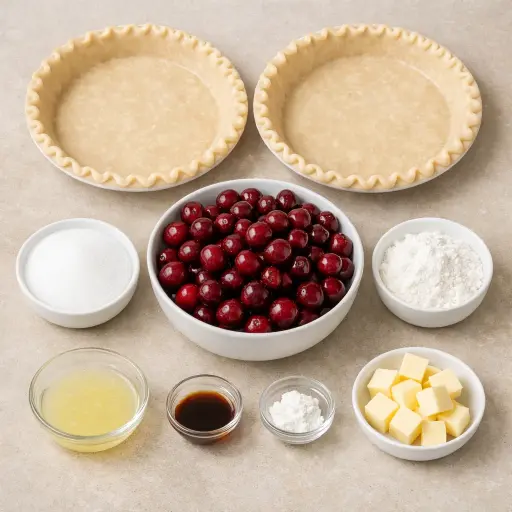
Pie crusts: The foundation of our pie, providing a flaky and buttery base and top. You can use store-bought to save time or homemade if you prefer.
Cherries: The star of the show! Fresh, pitted cherries offer natural sweetness and tartness. Feel free to use frozen cherries if fresh ones aren't available.
Granulated sugar: Adds sweetness and balances the tartness of the cherries.
Cornstarch: Helps thicken the cherry filling, ensuring it sets nicely without being too runny.
Lemon juice: Enhances the flavor of the cherries and adds a hint of freshness.
Vanilla extract: Adds a subtle depth of flavor, complementing the cherries.
Butter: Small pieces of butter are dotted on top of the filling to add richness and moisture.
Why This Traditional Cherry Pie Works
In the oven, the cherries and sugar start to bubble together. As the heat rises, the sugar melts and pulls out the cherry juices, so the filling looks very wet at first. The cornstarch is mixed all through that juice, and as it heats up, the tiny starch grains swell and thicken. Instead of a runny, watery center, the cherry liquid slowly turns into a glossy, soft gel that holds the fruit in place.
While that is happening, the crust is baking and setting around it. The bottom crust firms up and gives the filling something to sit on, so the cherries don’t just sink and soak it. On top, the butter pieces melt into the cherry mixture and also into the upper crust, so the fruit stays juicy but not dry, and the crust stays tender. After baking, cooling lets the thickened cherry juices settle and firm up even more, so slices hold together instead of sliding apart.
Traditional Cherry Pie Tips & Tricks
- If using frozen cherries, let them thaw and drain excess liquid to avoid a soggy pie.
- To prevent the crust edges from over-browning, cover them with foil halfway through baking.
- For a glossy crust, brush the top with a beaten egg before baking.
Mistakes To Avoid
Letting the pie bake until the crust is very dark can leave the filling undercooked. The top browns faster than the cherries thicken, so the crust turns hard and bitter while the center stays runny and never really sets, even after cooling.
Using cherries that are very wet and not draining off extra juice first can flood the filling. The cornstarch then has more liquid than it can handle, so the pie cuts into a soupy mess and the bottom crust turns soggy instead of holding its shape.
Stirring the cherry mixture only lightly so the cornstarch stays clumpy in spots causes uneven thickening. Some bites end up with thick, jelly-like blobs while other parts of the pie stay loose and watery.
Skipping the cooling time on the rack means the filling does not get a chance to firm up. The hot juices are still moving around under the crust, so when the pie is sliced, the filling runs out and the slices collapse.
Equipment Used:
Ingredients
- 2 9-inch pie crusts
- 4 cups cherries, pitted
- 1 cup granulated sugar
- 1/4 cup cornstarch
- 1 tablespoon lemon juice
- 1 teaspoon vanilla extract
- 1 tablespoon butter, cut into small pieces
Step-by-step Instructions
- 1. Preheat your oven to 425°F (220°C).
- 2. In a large bowl, combine the cherries, sugar, cornstarch, lemon juice, and vanilla extract. Stir until the cherries are well coated.
- 3. Roll out one pie crust and fit it into a 9-inch pie plate. Trim the excess dough.
- 4. Pour the cherry mixture into the crust-lined pie plate. Dot with butter.
- 5. Roll out the second crust and place it over the filling. Trim, seal, and flute the edges. Cut slits in the top to allow steam to escape.
- 6. Bake in the preheated oven for 45-50 minutes, or until the crust is golden brown and the filling is bubbly.
- 7. Let the pie cool on a wire rack before serving.
Trending Now

Old-Fashioned Bread Pudding
Discover the classic charm of Old-Fashioned Bread Pudding - a timeless dessert com...
View Recipe
Traditional Italian Bruschetta
Experience the authentic taste of Italian bruschetta, a perfect blend of fresh tom...
View Recipe
Classic Green Beans
Discover the timeless delight of Classic Green Beans, a simple yet flavorful side ...
View Recipe
Classic Banana Bread
Classic Banana Bread is a timeless dessert beloved for its moist texture and sweet...
View RecipeFrequently Asked Questions
- Can I use canned cherries?
- Yes, but adjust the sugar since canned cherries are often pre-sweetened.
- How do I store leftover pie?
- Keep it covered in the refrigerator for up to four days, or freeze for up to two months.
- Is there a way to make this pie gluten-free?
- Use a gluten-free pie crust and ensure your cornstarch is labeled gluten-free.
Serving Ideas for Traditional Cherry Pie
This pie pairs wonderfully with a scoop of vanilla ice cream or a dollop of freshly whipped cream. For a more indulgent treat, drizzle some melted chocolate over the top before serving.
More Desserts Recipes

Rustic Vanilla Peach Cobbler
This rustic vanilla peach cobbler combines a rich, buttery crust with the sweet, v...
View Recipe
Traditional Lemon Curd
A classic, tangy lemon curd that is perfect for enhancing desserts, breakfast dish...
View Recipe
Traditional Cream Cheese Pie
A delightful and timeless dessert, Traditional Cream Cheese Pie offers a rich and ...
View Recipe
Timeless Cream Puff Delight
Indulge in a delectable Timeless Cream Puff Delight, a classic dessert featuring a...
View Recipe