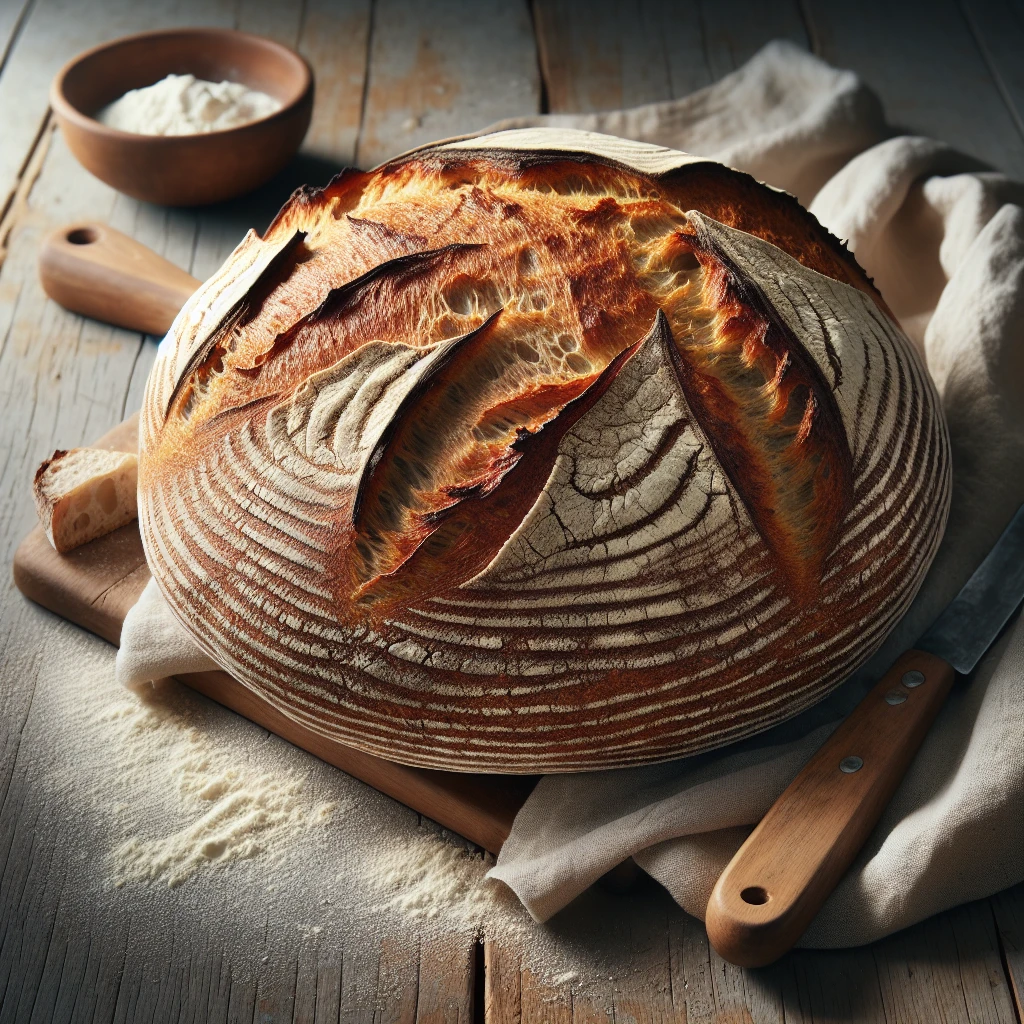
Timeless Sourdough Loaf
There’s something magical about baking your own bread, and this timeless sourdough loaf brings that magic right into your kitchen. With its crispy crust and chewy inside, it’s more than just bread—it’s an experience. Whether you’re a seasoned baker or a curious beginner, this recipe is your ticket to sourdough success.
This post may contain affiliate links. As an Amazon Associate, we earn from qualifying purchases.
Ingredients for Timeless Sourdough Loaf
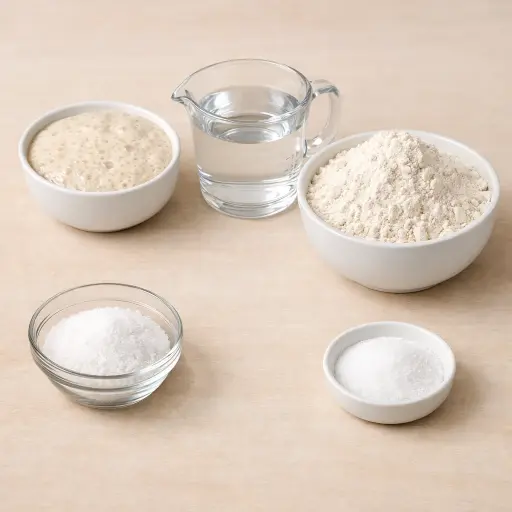
Sourdough starter is the heart of this bread, providing natural leavening and that signature tangy flavor. Make sure it’s active and bubbly before you start. Warm water helps the starter come alive and merge with the flour, creating a smooth dough. All-purpose flour is your main structure, giving the loaf its body and texture. Finally, salt enhances flavor and controls yeast activity during fermentation, ensuring a balanced rise.
Why This Timeless Sourdough Loaf Works
During mixing, the starter, water, and flour come together into a rough, sticky dough. As it sits and is kneaded, the flour soaks up the water and the gluten strands start to line up. The dough slowly changes from shaggy and messy to smooth and stretchy, which lets it trap gas later on.
Over the long rise at room temperature, the sourdough starter starts eating the flour and gives off gas. That gas gets caught inside the stretchy dough, so the whole ball of dough swells and gets full of tiny bubbles. At the same time, the dough relaxes and becomes easier to shape without tearing.
In the hot Dutch oven, the dough hits a blast of heat while it is still moist. The trapped steam inside the pot keeps the outside soft for the first part of baking, so the loaf can rise even more before the crust firms up. Once the lid comes off, the surface dries out and browns, while the inside finishes setting into a chewy, open crumb. Letting it cool on a rack keeps the crust crisp and the inside from turning gummy.
Timeless Sourdough Loaf Tips & Tricks
- Ensure your starter is active—feed it 4-8 hours before baking.
- If your kitchen is cold, extend the rise time or place the bowl in a warm spot.
- For a more pronounced sour flavor, extend the initial rise time in the fridge overnight.
Mistakes To Avoid
Letting the dough rise for too little time keeps it from puffing up properly. The dough goes into the oven still tight and heavy, so the loaf bakes up dense with a tight crumb instead of light and airy inside.
Using starter that is weak or straight from the fridge often leads to a sluggish rise. The dough just sits there and barely grows, so the finished bread comes out flat, gummy in the center, and can taste sharply sour because it fermented unevenly.
Adding extra flour during kneading until the dough feels “dry” makes the dough too stiff. The gluten tightens up, the loaf doesn’t expand much in the oven, and the crust turns hard while the inside stays tough and chewy instead of soft.
Putting the shaped dough into a cold Dutch oven instead of a preheated one changes how it bakes. The loaf warms up slowly, spreads outward instead of springing upward, and the crust stays pale and leathery instead of crisp and deeply browned.
Equipment Used:
Ingredients
- 1 cup sourdough starter
- 1 1/2 cups warm water
- 4 cups all-purpose flour
- 1 tablespoon salt
Step-by-step Instructions
- 1. In a large bowl, combine the sourdough starter and warm water.
- 2. Gradually add the flour and salt, mixing until a shaggy dough forms.
- 3. Knead the dough on a lightly floured surface for about 10 minutes until smooth and elastic.
- 4. Place the dough in a lightly greased bowl, cover, and let it rise at room temperature for 4-5 hours, or until doubled in size.
- 5. Preheat your oven to 450°F (232°C) and place a Dutch oven inside to heat.
- 6. Shape the dough into a round loaf, place on parchment paper, and let it rest for 30 minutes.
- 7. Carefully transfer the dough with parchment into the preheated Dutch oven, cover, and bake for 25 minutes.
- 8. Remove the lid and bake for another 20 minutes, or until the loaf is golden brown.
- 9. Let the bread cool on a wire rack before slicing.
Trending Now

Old-Fashioned Bread Pudding
Discover the classic charm of Old-Fashioned Bread Pudding - a timeless dessert com...
View Recipe
Traditional Italian Bruschetta
Experience the authentic taste of Italian bruschetta, a perfect blend of fresh tom...
View Recipe
Classic Green Beans
Discover the timeless delight of Classic Green Beans, a simple yet flavorful side ...
View Recipe
Classic Banana Bread
Classic Banana Bread is a timeless dessert beloved for its moist texture and sweet...
View RecipeFrequently Asked Questions
- How do I know if my starter is ready?
- It should be bubbly and doubled in size within 4-6 hours of feeding.
- Can I use whole wheat flour?
- Yes, but you may need to adjust the water amount as whole wheat absorbs more moisture.
- Why is my bread dense?
- Dense bread can result from under-kneading or not letting the dough rise long enough.
Serving Ideas for Timeless Sourdough Loaf
This sourdough is perfect for a hearty sandwich or as a side with a bowl of soup. Try it toasted with a smear of butter and a sprinkle of sea salt for a simple yet satisfying treat. It’s also an excellent companion to a cheese board, complementing creamy brie and sharp cheddar beautifully.
More Breads & Baked Goods Recipes

Traditional Italian Easter Bread
Savor the delightful taste of a classic Italian Easter bread, a sweet, soft, and s...
View Recipe
Old-Fashioned Pineapple Bread
A delightful and flavorful bread infused with juicy pineapple, perfect for breakfa...
View Recipe
Old-Fashioned Blueberry Muffins
Transport yourself to simpler times with these delightful old-fashioned blueberry ...
View Recipe
Strawberry Basil Scones
These tender scones combine the sweetness of fresh strawberries with a hint of pep...
View Recipe