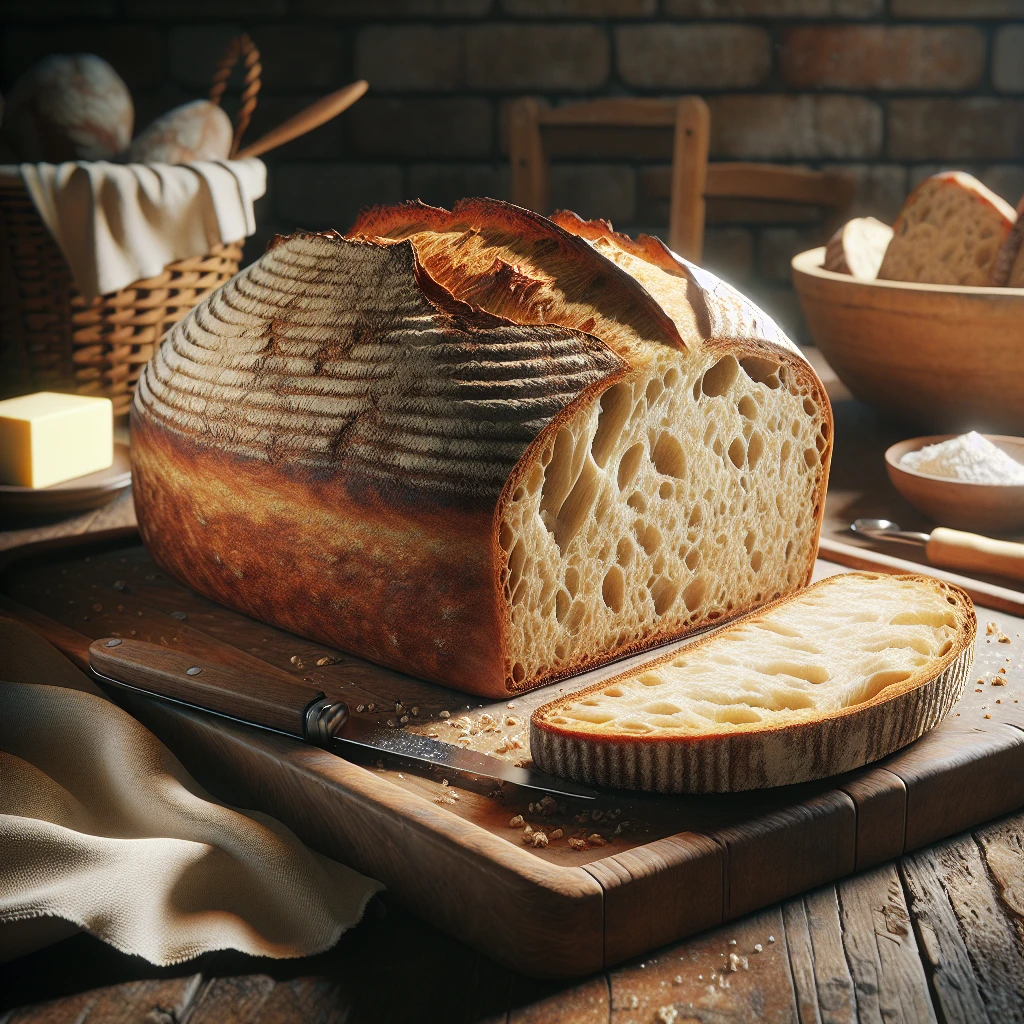
Sourdough Bread
Sourdough bread, with its tangy flavor and chewy texture, is a timeless classic. This recipe is perfect for both seasoned bakers and enthusiastic newcomers. It's all about patience, love, and a little bit of science.
This post may contain affiliate links. As an Amazon Associate, we earn from qualifying purchases.
Ingredients for Sourdough Bread
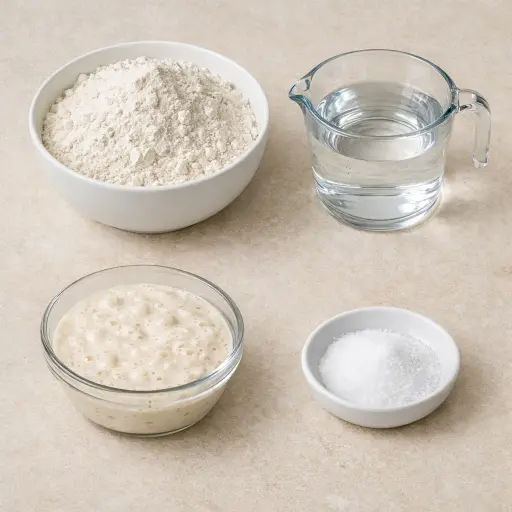
All-purpose flour forms the backbone of this bread, providing structure and chewiness. Water hydrates the flour, allowing gluten to develop. Sourdough starter is the hero here, giving the bread its unique flavor and aiding in its rise. Lastly, salt enhances the overall taste and strengthens the gluten structure.
Why This Sourdough Bread Works
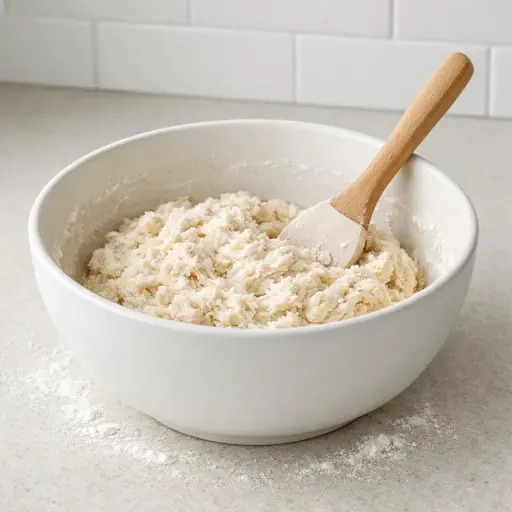
During the first rest with just flour and water, the flour slowly soaks up the water. Gluten starts to form on its own without much work. The dough feels smoother and less sticky after this, so it can stretch instead of tearing later.
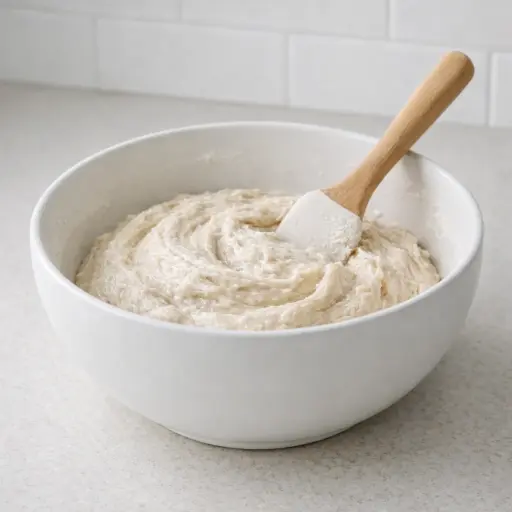
Once the sourdough starter and salt go in, the starter begins to eat the flour and give off gas. During the stretch and folds, that gas gets trapped inside the dough instead of leaking out. Each fold lines up the gluten more and more, so the dough can hold its shape and keep those bubbles. Over a few hours, it goes from shaggy and loose to bouncy and airy.
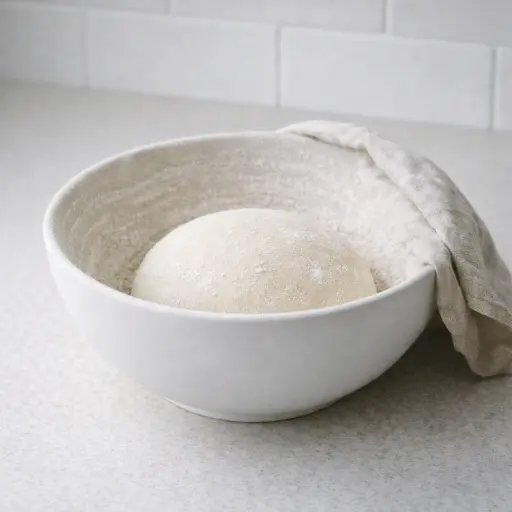
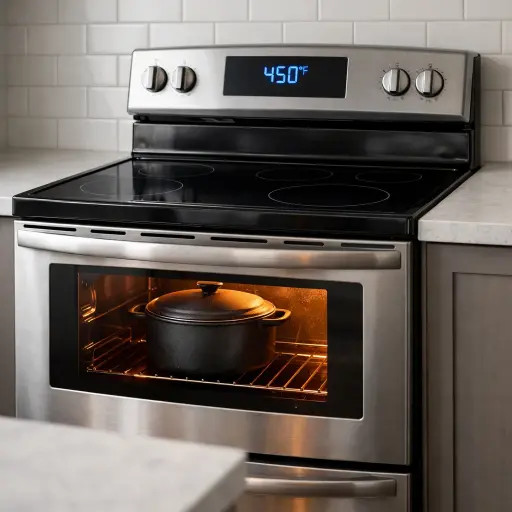
In the fridge overnight, the dough rises slowly and firms up. It’s easier to score and doesn’t spread out like a pancake. In the hot Dutch oven, steam stays around the dough at first, so the loaf can rise high before the crust sets. Once the lid comes off, the surface dries out and browns, giving a crisp shell while the inside stays moist and chewy.
Sourdough Bread Tips & Tricks
- Ensure your starter is active and bubbly before using it. A sluggish starter can lead to a dense loaf.
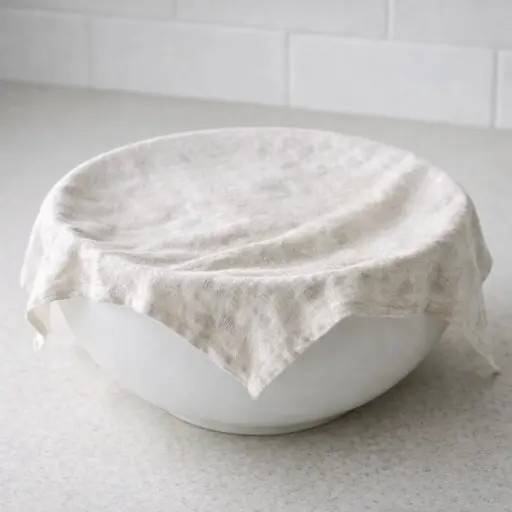
- If you don't have a banneton, a bowl with a floured kitchen towel works just fine.
- Don't skip the autolyse step; it makes a noticeable difference in the final texture.
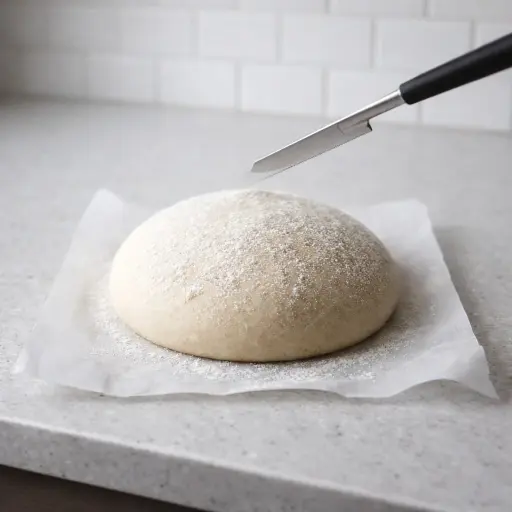
- Use a sharp blade for scoring to avoid deflating the dough.
Mistakes To Avoid
Letting the starter be weak or not very bubbly leads to a slow, lazy rise. The dough stays dense and tight instead of puffing up, so the baked loaf comes out flat with a tight, heavy crumb instead of an open, airy inside.
Skipping or rushing the 30-minute flour-and-water rest means the flour does not soak up the water properly. The dough then feels rough and tears during stretch and folds, and the finished bread tends to have a tougher chew and a less even crumb.
Overdoing the stretch and folds, or handling the dough roughly, can squeeze out the gas that is building up. The dough loses its lightness, spreads out instead of holding shape, and bakes into a wide, low loaf with fewer holes inside.
Cutting the cold-proof short in the fridge, or letting it go way past 18 hours, throws off the dough’s structure. Too short and the loaf bakes up tight and small; too long and the dough can over-relax, stick badly, and collapse in the oven.
Slicing into the bread before it has cooled for at least an hour lets the steam rush out too fast. The crumb then turns gummy and squishy, and the slices compress instead of staying light and springy.
Equipment Used:
Mixing bowl, Dutch oven, Banneton, Parchment paper, Sharp knife
Ingredients
- 3 cups all-purpose flour
- 1 1/2 cups water
- 1 cup active sourdough starter
- 1 1/2 teaspoons salt
Step-by-step Instructions
- 1. In a large mixing bowl, combine the flour and water. Mix until no dry flour remains. Let it rest for 30 minutes.
- 2. Add the sourdough starter and salt to the dough. Mix well until fully incorporated.
- 3. Cover the bowl with a damp cloth and let the dough rise at room temperature for 4-5 hours, performing stretch and folds every 30 minutes for the first 2 hours.
- 4. After the initial rise, gently shape the dough into a round loaf. Place it into a well-floured banneton or bowl. Cover and refrigerate overnight for 12-18 hours.
- 5. Preheat your oven to 450°F (232°C) and place a Dutch oven inside to heat up.
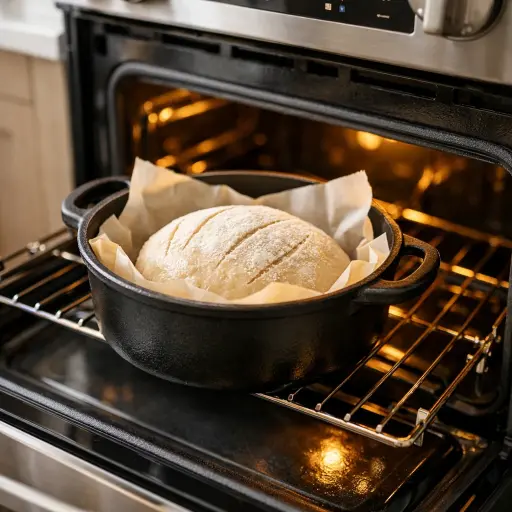
- 6. Carefully transfer the dough to a piece of parchment paper and score the top with a sharp knife or razor blade.
- 7. Place the dough with the parchment paper into the preheated Dutch oven. Cover with the lid and bake for 20 minutes.
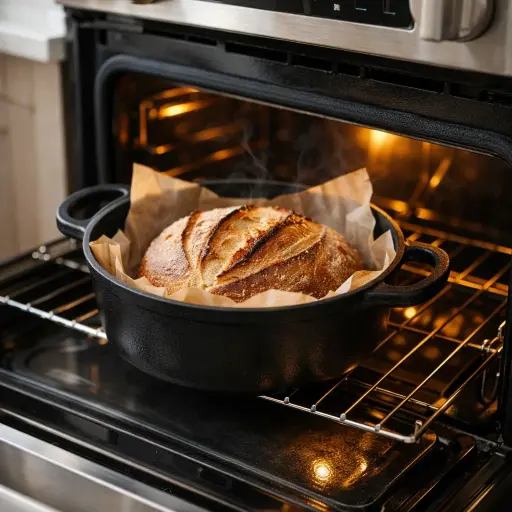
- 8. Remove the lid and bake for another 25 minutes or until the crust is deep golden brown and crispy.
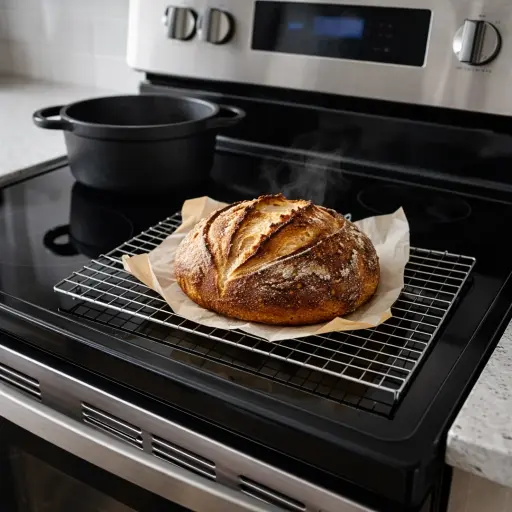
- 9. Let the bread cool on a wire rack for at least 1 hour before slicing.
Trending Now

Classic Banana Bread
Classic Banana Bread is a timeless dessert beloved for its moist texture and sweet...
View Recipe
Classic Cucumber Salad
A refreshing and light cucumber salad featuring crisp cucumbers and a tangy vinaig...
View Recipe
Zesty Summer Squash Casserole
This delightful summer squash casserole combines vibrant garden-fresh vegetables w...
View Recipe
Traditional Dump Cake
Discover the timeless delight of the Traditional Dump Cake, a simple and scrumptio...
View RecipeFrequently Asked Questions
- Why is my bread so dense?
- Your starter might not be active enough, or the dough could be under-proofed. Make sure to give it enough time to rise.
- Can I use whole wheat flour?
- You can substitute some of the all-purpose flour with whole wheat flour, but it may affect the texture and rise slightly.
- How do I store sourdough bread?
- Keep it at room temperature in a bread bag or wrapped in a kitchen towel. Avoid airtight containers as they can make the crust lose its crispness.
Serving Ideas for Sourdough Bread
This sourdough is fantastic with a generous spread of butter and a sprinkle of sea salt. It pairs beautifully with creamy soups or as a base for a hearty sandwich. For a delightful breakfast, try it toasted with avocado and a poached egg.
More Breads & Baked Goods Recipes

Traditional Italian Easter Bread
Savor the delightful taste of a classic Italian Easter bread, a sweet, soft, and s...
View Recipe
Old-Fashioned Pineapple Bread
A delightful and flavorful bread infused with juicy pineapple, perfect for breakfa...
View Recipe
Old-Fashioned Blueberry Muffins
Transport yourself to simpler times with these delightful old-fashioned blueberry ...
View Recipe
Strawberry Basil Scones
These tender scones combine the sweetness of fresh strawberries with a hint of pep...
View Recipe