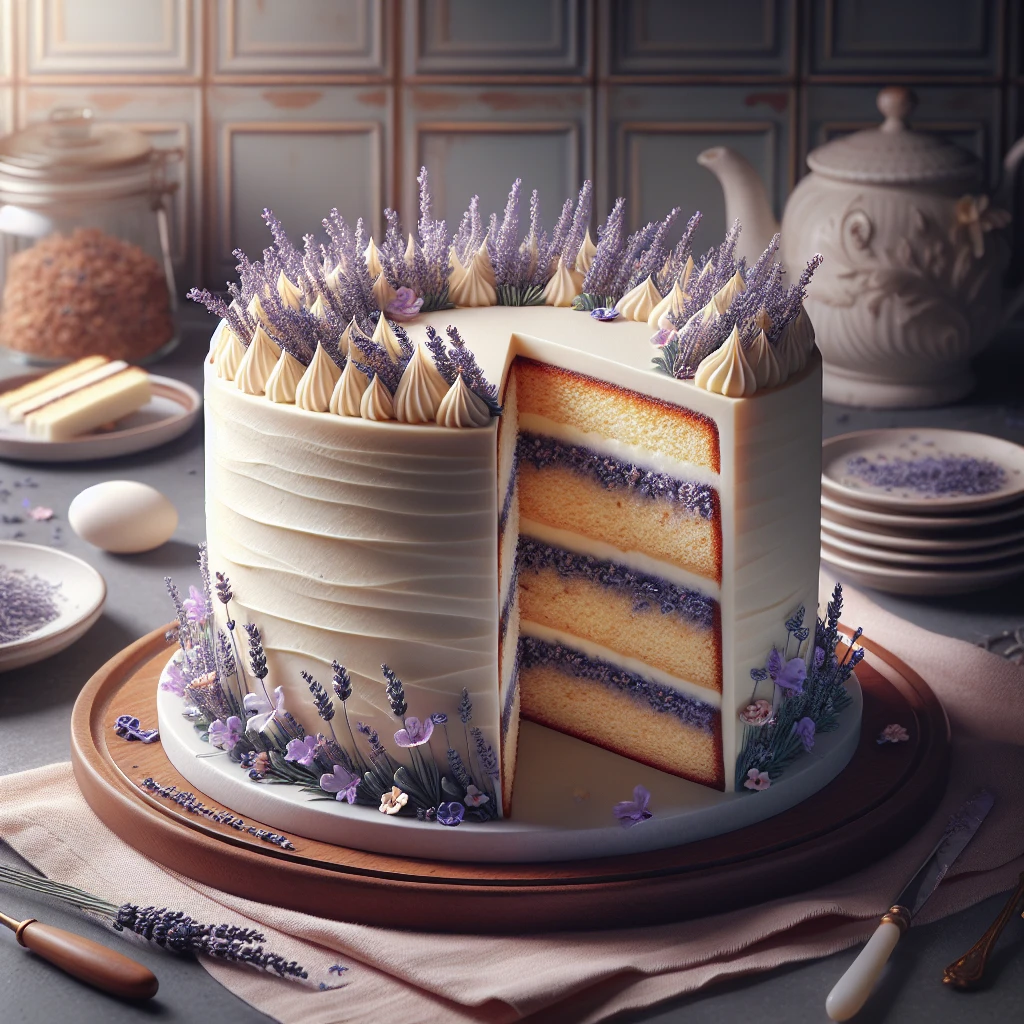
Lavender Vanilla Bean Dream Cake
This Lavender Vanilla Bean Dream Cake is a whimsical treat that combines the floral notes of lavender with the rich, creamy sweetness of vanilla. Perfect for a spring gathering or a special occasion, this cake offers a unique twist on a classic vanilla cake, making it a standout dessert.
This post may contain affiliate links. As an Amazon Associate, we earn from qualifying purchases.
Ingredients for Lavender Vanilla Bean Dream Cake
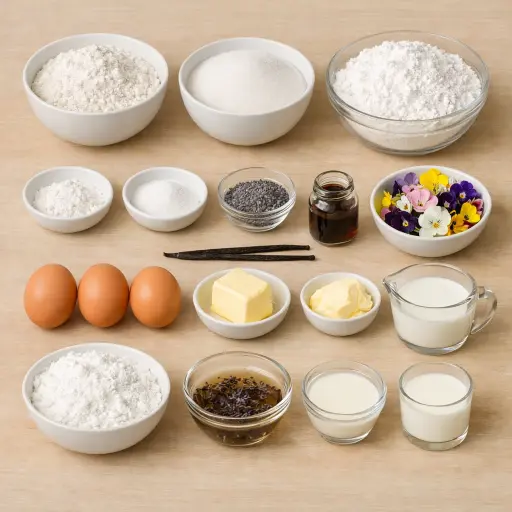
All-purpose flour forms the structure of the cake, giving it body and lift. Granulated sugar sweetens the batter and helps with browning. Baking powder is the leavening agent that ensures your cake rises beautifully. A touch of salt balances the sweetness and enhances the other flavors.
Unsalted butter contributes to the cake's rich texture and buttery flavor. Using whole milk adds moisture and richness, while large eggs bind all the ingredients together. The star of the show, culinary lavender, adds a subtle floral hint. Vanilla bean seeds and vanilla extract infuse the cake with deep, authentic vanilla flavor.
For the buttercream, unsalted butter provides a creamy base. Powdered sugar sweetens and thickens the frosting. Heavy cream softens the texture, and a lavender infusion subtly mirrors the cake’s flavor. Edible flowers make for a stunning, natural decoration.
Why This Lavender Vanilla Bean Dream Cake Works
In the oven, the batter slowly sets and holds its shape. Butter and sugar start out soft and fluffy from beating, so air is already trapped inside. As the cake heats, the baking powder makes tiny bubbles, and those bubbles stay in place because the eggs and flour firm up around them. That is why the cake comes out light instead of dense. Milk keeps the crumb moist while the butter melts and spreads through the flour, so the cake stays tender instead of drying out.
While it bakes, the ground lavender and vanilla bean seeds spread through the whole cake, not just in one spot. Every bite ends up tasting the same. After baking, cooling on the rack lets the steam escape slowly, so the layers don’t collapse or turn gummy in the middle.
In the buttercream, soft butter and powdered sugar beat together until they trap a lot of tiny air pockets. The heavy cream and lavender water loosen the frosting just enough so it spreads smoothly and stays fluffy on the cake instead of sliding off.
Lavender Vanilla Bean Dream Cake Tips & Tricks
- Ensure butter is at room temperature for the best creaming results.
- Grind the lavender finely to avoid a gritty texture in the cake.
- Use a serrated knife to level the cakes before frosting for a neat finish.
- If your lavender flavor is too strong, reduce the amount slightly next time for a subtler taste.
Mistakes To Avoid
Overbaking the cake layers easily turns this into a dry, crumbly cake that breaks when stacked. Once the edges pull far from the pan and the top looks very dark, the inside has usually lost too much moisture, so the crumb feels rough instead of soft and tender.
Adding too much lavender, or not grinding it finely, often makes the cake and frosting taste harsh and slightly bitter, with little hard bits in each bite. Instead of a light floral note, the whole cake can feel perfumey and leave a dry feeling in the mouth.
Skipping the step of cooling the cakes completely before frosting causes the buttercream to melt and slide off. The warm layers soften the butter in the frosting, so it turns glossy and runny, and the top layer can slowly drift to one side.
Pouring the lavender infusion for the buttercream while it is still very hot can split the frosting. The heat melts the butter unevenly, so the mixture can look greasy and loose instead of thick, smooth, and fluffy.
Ingredients
- 1 1/2 cups all-purpose flour
- 1 cup granulated sugar
- 2 tsp baking powder
- 1/2 tsp salt
- 1/2 cup unsalted butter, softened
- 1/2 cup whole milk
- 3 large eggs
- 1 tbsp culinary lavender, ground
- 1 vanilla bean, seeds scraped
- 1 tsp vanilla extract
- 1/2 cup unsalted butter, softened (for buttercream)
- 3 cups powdered sugar (for buttercream)
- 2 tbsp heavy cream (for buttercream)
- 1 tsp culinary lavender, steeped in 1 tbsp boiling water (for buttercream)
- Edible flowers for decoration
Step-by-step Instructions
- 1. Preheat the oven to 350°F (175°C) and grease two 8-inch round cake pans.
- 2. In a bowl, mix flour, baking powder, and salt. Set aside.
- 3. In another bowl, cream together butter and granulated sugar until light and fluffy. Add eggs one at a time, mixing well after each.
- 4. Add vanilla bean seeds and vanilla extract to the butter mixture.
- 5. Gradually add dry ingredients to the wet ingredients, alternating with milk. Fold in the ground lavender.
- 6. Divide the batter evenly between the prepared cake pans and bake for 25-30 minutes, or until a toothpick inserted in the center comes out clean.
- 7. Cool the cakes in the pans for 10 minutes, then transfer to a wire rack to cool completely.
- 8. For the buttercream: Beat butter until creamy. Gradually add powdered sugar, heavy cream, and lavender infusion, beating until smooth and fluffy.
- 9. Once the cakes are cool, spread a layer of buttercream over the top of one cake layer, place the second layer on top, and frost the entire cake with the remaining buttercream.
- 10. Decorate with edible flowers before serving.
Trending Now

Old-Fashioned Bread Pudding
Discover the classic charm of Old-Fashioned Bread Pudding - a timeless dessert com...
View Recipe
Traditional Italian Bruschetta
Experience the authentic taste of Italian bruschetta, a perfect blend of fresh tom...
View Recipe
Classic Green Beans
Discover the timeless delight of Classic Green Beans, a simple yet flavorful side ...
View Recipe
Classic Banana Bread
Classic Banana Bread is a timeless dessert beloved for its moist texture and sweet...
View RecipeFrequently Asked Questions
- Can I use dried lavender from the garden?
- Yes, just ensure it's culinary-grade and free from pesticides.
- How can I make this cake gluten-free?
- Substitute all-purpose flour with a gluten-free flour blend, but check the specific blend's instructions for any adjustments.
Serving Ideas for Lavender Vanilla Bean Dream Cake
This cake pairs beautifully with a light herbal tea or a glass of chilled prosecco. You could also serve it alongside fresh berries or a dollop of whipped cream for added indulgence.
More Desserts Recipes

Rustic Vanilla Peach Cobbler
This rustic vanilla peach cobbler combines a rich, buttery crust with the sweet, v...
View Recipe
Traditional Lemon Curd
A classic, tangy lemon curd that is perfect for enhancing desserts, breakfast dish...
View Recipe
Traditional Cream Cheese Pie
A delightful and timeless dessert, Traditional Cream Cheese Pie offers a rich and ...
View Recipe
Timeless Cream Puff Delight
Indulge in a delectable Timeless Cream Puff Delight, a classic dessert featuring a...
View Recipe