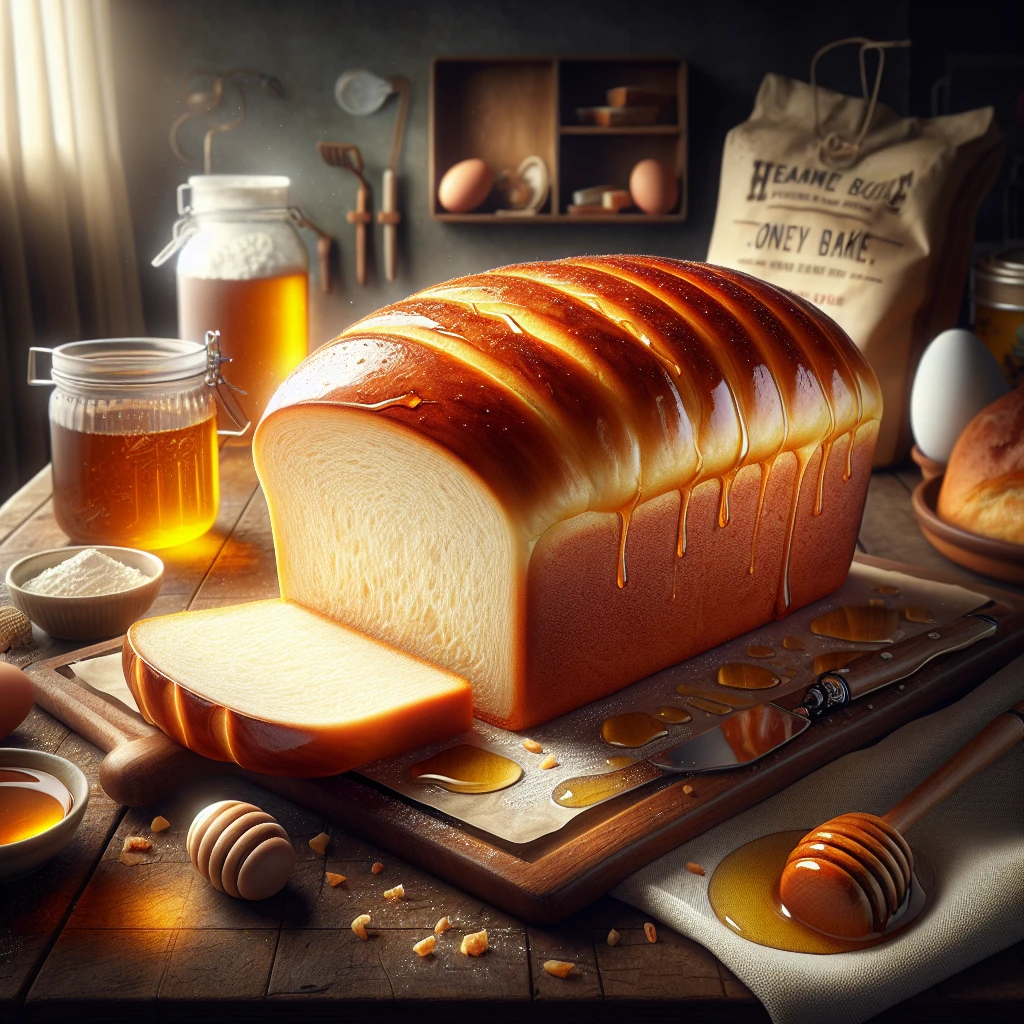
Homestead Honey White Bread
Homestead Honey White Bread is a delightful twist on the classic loaf that combines the comforting taste of homemade bread with a hint of sweetness from honey. This recipe is perfect for both novices and seasoned bakers looking for a trusty staple in their baking repertoire.
This post may contain affiliate links. As an Amazon Associate, we earn from qualifying purchases.
Ingredients for Homestead Honey White Bread
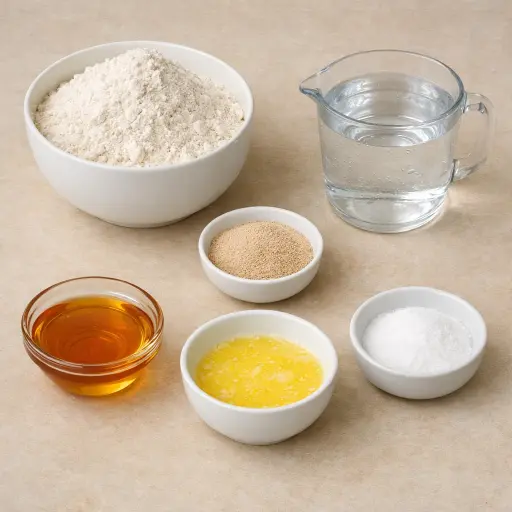
All-purpose flour is the backbone of our bread, providing structure and chewiness. Active dry yeast does the heavy lifting, fermenting the dough and making it rise. Warm water activates the yeast, creating a perfect environment for it to thrive. Honey adds a gentle sweetness and moisture to the bread, while unsalted butter enriches the dough, contributing to a tender crumb. Finally, salt enhances all the flavors, balancing out the sweetness and bringing everything together.
Why This Homestead Honey White Bread Works
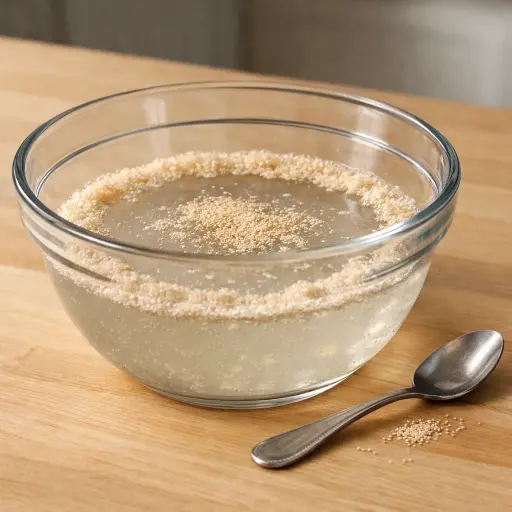
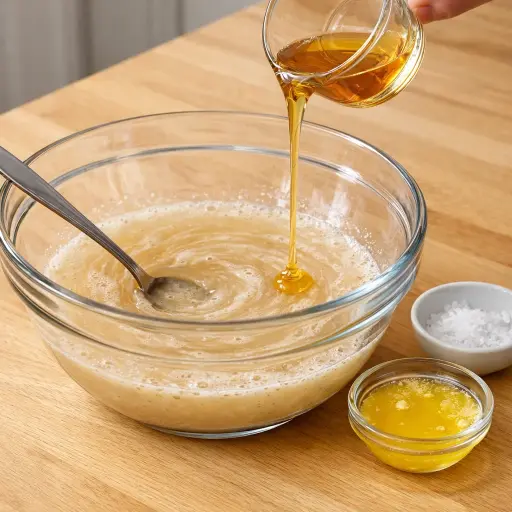
Warm water wakes up the yeast so it starts to bubble and come alive. As it sits, the yeast begins to feed on the honey, which gives it easy sugar to eat. While that happens, the water soaks into the flour and starts softening the starch and gluten. Once everything is mixed, the dough is still rough, but it already holds together in one piece.
During kneading, the flour and water form long stretchy strands. The dough changes from sticky and lumpy to smooth and springy. Honey and melted butter coat those strands so they don’t dry out, and the salt keeps the dough from growing too fast and getting weak. While the dough rises, the yeast makes tiny gas bubbles that get trapped inside that stretchy gluten net.
In the oven, those bubbles expand and push the dough up one last time. Heat sets the gluten so the bread keeps its shape instead of collapsing. The outside dries first and turns golden, while the inside stays soft from the water and honey. After baking, cooling on a rack lets steam escape so the slices stay tender, not gummy.
Homestead Honey White Bread Tips & Tricks
- If your yeast doesn’t foam, it might be dead. Start over with a fresh packet.
- To help your dough rise, place it in a warm, draft-free area like an oven with the light on.
- For a softer crust, brush the top of the hot loaves with melted butter right after baking.
Mistakes To Avoid
Using water that is too hot kills the yeast before the dough even forms. The mixture may look fine at first, but the dough barely rises, stays heavy, and bakes into a flat, dense loaf with a tight crumb instead of soft slices.
Adding all the flour at once often leaves dry pockets and a stiff dough. The flour doesn’t hydrate evenly, kneading feels tough and clumsy, and the baked bread comes out hard and crumbly instead of stretchy and tender.
Cutting the kneading time short keeps the gluten from building enough strength. The dough tears easily, doesn’t trap gas well during rising, and the finished loaves end up squat with uneven holes and a gummy texture.
Letting the dough rise far past “doubled” makes it overproofed. During baking it can collapse in the center, the crust separates from the crumb, and the slices look sunken and feel oddly dry yet spongy.
Slicing the bread while it is still hot squeezes out steam and moisture. The crumb gets squashed, turns gummy and sticky on the knife, and the loaf stales faster.
Equipment Used:
Oven, Mixing Bowl, Measuring Cups, Measuring Spoons, Loaf Pans
Ingredients
- 5 cups all-purpose flour
- 1 packet active dry yeast (2 1/4 tsp)
- 2 cups warm water (110°F)
- 1/4 cup honey
- 2 tbsp unsalted butter, melted
- 2 tsp salt
Step-by-step Instructions
- 1. In a large bowl, dissolve yeast in warm water and let stand until foamy, about 5 minutes.
- 2. Stir in honey, melted butter, and salt into the yeast mixture.
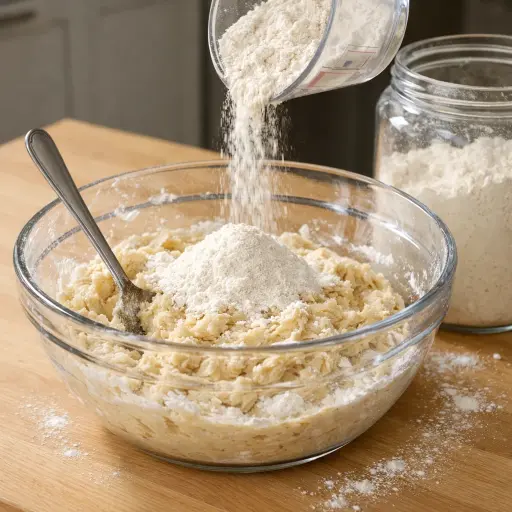
- 3. Gradually add flour, one cup at a time, until a dough forms.
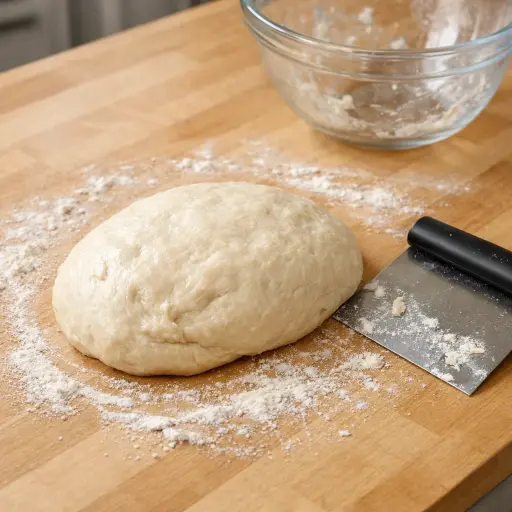
- 4. Knead the dough on a floured surface for about 10 minutes until smooth and elastic.
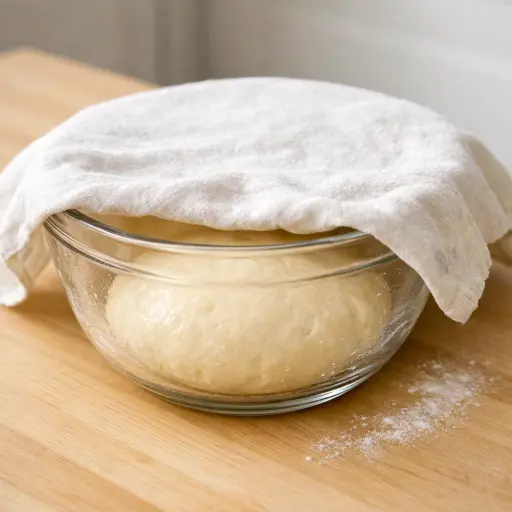
- 5. Place the dough in a greased bowl, cover with a damp cloth, and let it rise until doubled in size, about 1 hour.
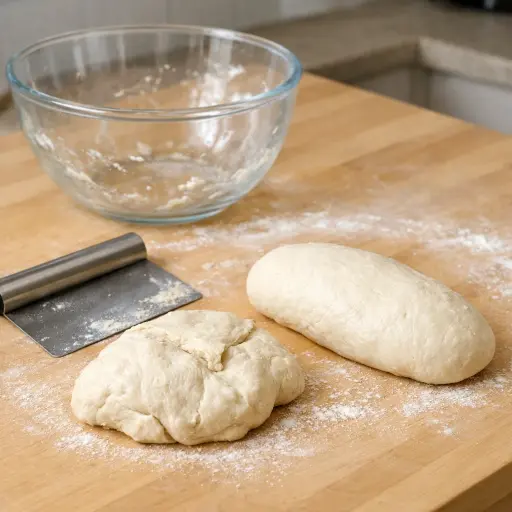
- 6. Punch down the dough, divide it in half, and shape each half into a loaf.
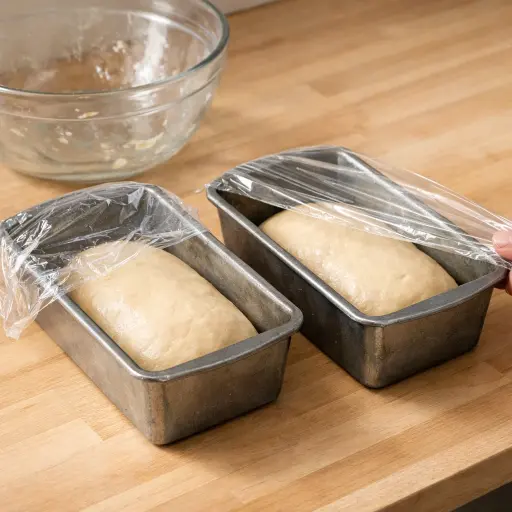
- 7. Place loaves in greased 9x5 inch loaf pans, cover, and let rise again until doubled, about 30 minutes.
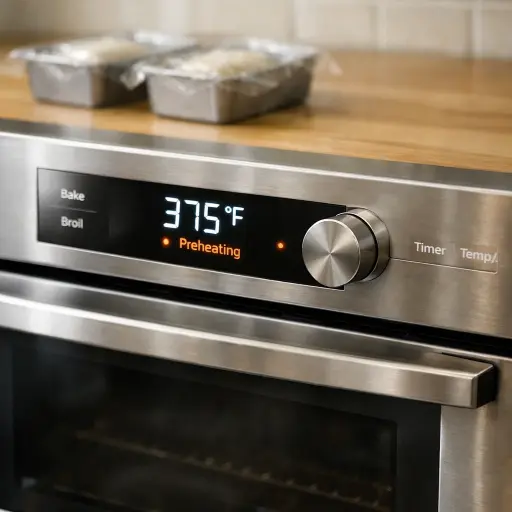
- 8. Preheat oven to 375°F (190°C).
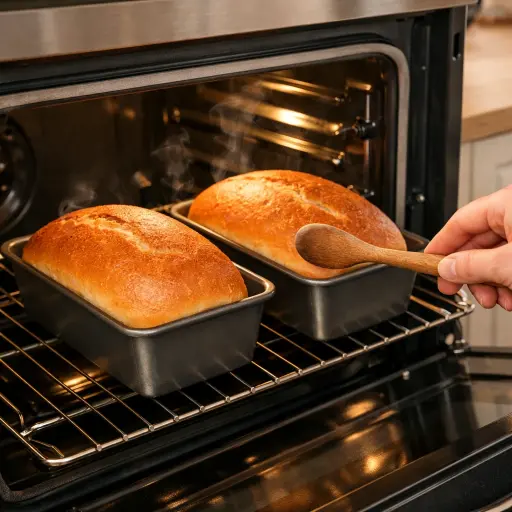
- 9. Bake loaves for 25-30 minutes or until golden brown and sound hollow when tapped.
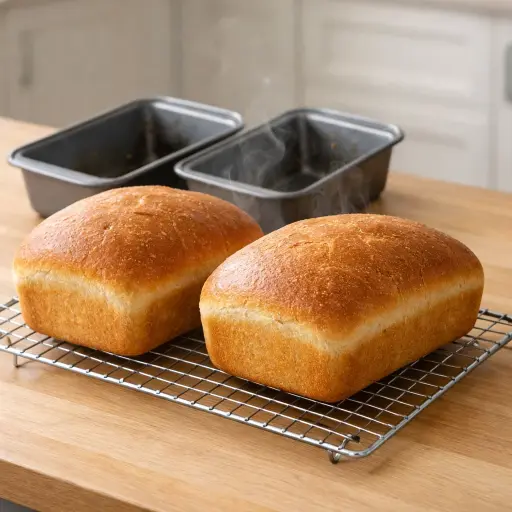
- 10. Let cool on a wire rack before slicing.
Trending Now

Old-Fashioned Bread Pudding
Discover the classic charm of Old-Fashioned Bread Pudding - a timeless dessert com...
View Recipe
Traditional Italian Bruschetta
Experience the authentic taste of Italian bruschetta, a perfect blend of fresh tom...
View Recipe
Classic Green Beans
Discover the timeless delight of Classic Green Beans, a simple yet flavorful side ...
View Recipe
Classic Banana Bread
Classic Banana Bread is a timeless dessert beloved for its moist texture and sweet...
View RecipeFrequently Asked Questions
- Can I use whole wheat flour instead of all-purpose?
- Yes, but keep in mind that whole wheat flour will make the bread denser and might require more water.
- Can I make this bread without a loaf pan?
- Absolutely! Shape it into a free-form loaf and bake on a baking sheet lined with parchment paper.
Serving Ideas for Homestead Honey White Bread
This bread is a versatile companion to many meals. Serve it warm with a pat of butter alongside a hearty soup or stew. It also makes for excellent sandwiches or toast with your favorite jam or honey drizzle.
More Breads & Baked Goods Recipes

Traditional Italian Easter Bread
Savor the delightful taste of a classic Italian Easter bread, a sweet, soft, and s...
View Recipe
Old-Fashioned Pineapple Bread
A delightful and flavorful bread infused with juicy pineapple, perfect for breakfa...
View Recipe
Old-Fashioned Blueberry Muffins
Transport yourself to simpler times with these delightful old-fashioned blueberry ...
View Recipe
Strawberry Basil Scones
These tender scones combine the sweetness of fresh strawberries with a hint of pep...
View Recipe