Ginger and Honey Baked Apples
Welcome to a cozy, heartwarming treat: Ginger and Honey Baked Apples! This recipe combines the natural sweetness of apples with the zing of ginger and the warmth of cinnamon, resulting in a delightful dessert perfect for chilly evenings.

This post may contain affiliate links. As an Amazon Associate, we earn from qualifying purchases.
Ingredients for Ginger and Honey Baked Apples
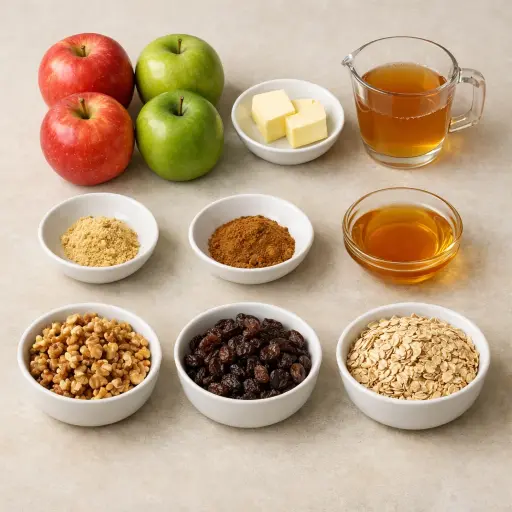
Apples are the star of this show, and using tart ones like Granny Smith or Honeycrisp balances the sweet filling perfectly. Butter adds richness, helping to bind and soften the stuffing. Honey brings natural sweetness and a floral note, while ground ginger provides a spicy warmth that complements the fruit. Ground cinnamon is a classic partner to apples, enhancing their flavor. Walnuts add a satisfying crunch and nutty depth, and raisins offer little bursts of sweetness. Rolled oats give the filling a hearty texture, and brown sugar deepens the sweetness with a hint of molasses. Finally, apple cider infuses moisture and a subtle apple flavor into the baking process, making the apples tender and juicy.
Why This Ginger and Honey Baked Apples Works
In the oven, the apples slowly soften while still holding their shape. Coring them but leaving the bottom on turns each one into a little bowl, so the filling stays inside instead of spilling out. As the apples bake, their juices mix with the honey and brown sugar, so the inside becomes syrupy and sweet while the outside flesh turns tender.
During baking, the butter melts and soaks into the oats, walnuts, and raisins. That makes the filling stick together instead of drying out. The oats swell a bit and the nuts stay a little firm, so there is a soft apple around a chewy, crunchy center. Ground ginger and cinnamon spread through the warm butter and honey, so every bite tastes the same all the way through.
With apple cider in the dish, the heat creates steam around the apples. That gentle steam keeps the skins from drying or cracking too fast. As they are basted with the cider, the outside stays moist and shiny, and some of that liquid seeps into the apples, giving them a juicy, almost sauced middle without needing a separate sauce.
Ginger and Honey Baked Apples Tips & Tricks
- Use an apple corer for a quick and even removal of the core.
- If available, use fresh ginger for an extra burst of flavor.
- Substitute pecans for walnuts if you prefer a different nutty flavor.
Mistakes To Avoid
Letting the apples overbake until they collapse turns them from soft and spoonable into a mushy pile with broken skins. The filling leaks out into the dish, the oats go past tender and turn gluey, and the apples lose their shape so they are hard to serve neatly.
Cutting out too much of the core or punching a hole through the bottom leaves no “cup” to hold the filling. As the apples bake, the butter, honey, and sugar run straight out into the cider, so the centers stay almost empty and the liquid in the dish becomes overly sweet and sticky.
Packing the filling too loosely means big air gaps inside the apples. During baking, the butter melts and the honey thins out, so the mixture shrinks and sinks, leaving a hollow top and a dry, patchy filling instead of a moist, even center.
Skipping the basting step often leads to dry, leathery apple skins. Without that spooned-over cider, the tops don’t stay moist, the sugar on top can harden too much, and the apples cook unevenly from outside to inside.
Equipment Used:
Ingredients
- 4 large apples (Granny Smith or Honeycrisp)
- 2 tbsp unsalted butter
- 1/4 cup honey
- 1 tsp ground ginger
- 1/2 tsp ground cinnamon
- 1/4 cup chopped walnuts
- 1/4 cup raisins
- 1/4 cup rolled oats
- 1/4 cup brown sugar
- 1/2 cup apple cider
Step-by-step Instructions
- 1. Preheat oven to 350°F (175°C).
- 2. Core the apples, leaving the bottom intact to hold the filling.
- 3. In a bowl, mix butter, honey, ginger, cinnamon, walnuts, raisins, oats, and brown sugar until well combined.
- 4. Stuff each apple with the mixture, pressing down gently to pack tightly.
- 5. Place the apples in a baking dish and pour apple cider around the apples.
- 6. Bake for 35-40 minutes, basting occasionally with the cider, until apples are tender.
- 7. Remove from oven and let cool slightly before serving.
Trending Now

Zesty Summer Squash Casserole
This delightful summer squash casserole combines vibrant garden-fresh vegetables w...
View Recipe
Classic Cucumber Salad
A refreshing and light cucumber salad featuring crisp cucumbers and a tangy vinaig...
View Recipe
Classic Banana Bread
Classic Banana Bread is a timeless dessert beloved for its moist texture and sweet...
View Recipe
Traditional Dump Cake
Discover the timeless delight of the Traditional Dump Cake, a simple and scrumptio...
View RecipeFrequently Asked Questions
- Can I use other types of apples?
- Yes, you can use any firm apple variety, but keep in mind that sweetness and texture may vary.
- How do I store leftovers?
- Store any leftovers in an airtight container in the refrigerator for up to three days. Reheat before serving.
- Can I make this recipe vegan?
- Simply replace the butter with a plant-based alternative and ensure the honey is vegan or substitute it with maple syrup.
Serving Ideas for Ginger and Honey Baked Apples
These baked apples are best served warm. Enjoy them on their own, or for a decadent touch, top with a scoop of vanilla ice cream or a dollop of whipped cream. They pair wonderfully with a glass of chilled apple cider or a mug of herbal tea.
More Desserts Recipes

Rustic Vanilla Peach Cobbler
This rustic vanilla peach cobbler combines a rich, buttery crust with the sweet, v...
View Recipe
Traditional Lemon Curd
A classic, tangy lemon curd that is perfect for enhancing desserts, breakfast dish...
View Recipe
Traditional Cream Cheese Pie
A delightful and timeless dessert, Traditional Cream Cheese Pie offers a rich and ...
View Recipe
Timeless Cream Puff Delight
Indulge in a delectable Timeless Cream Puff Delight, a classic dessert featuring a...
View Recipe