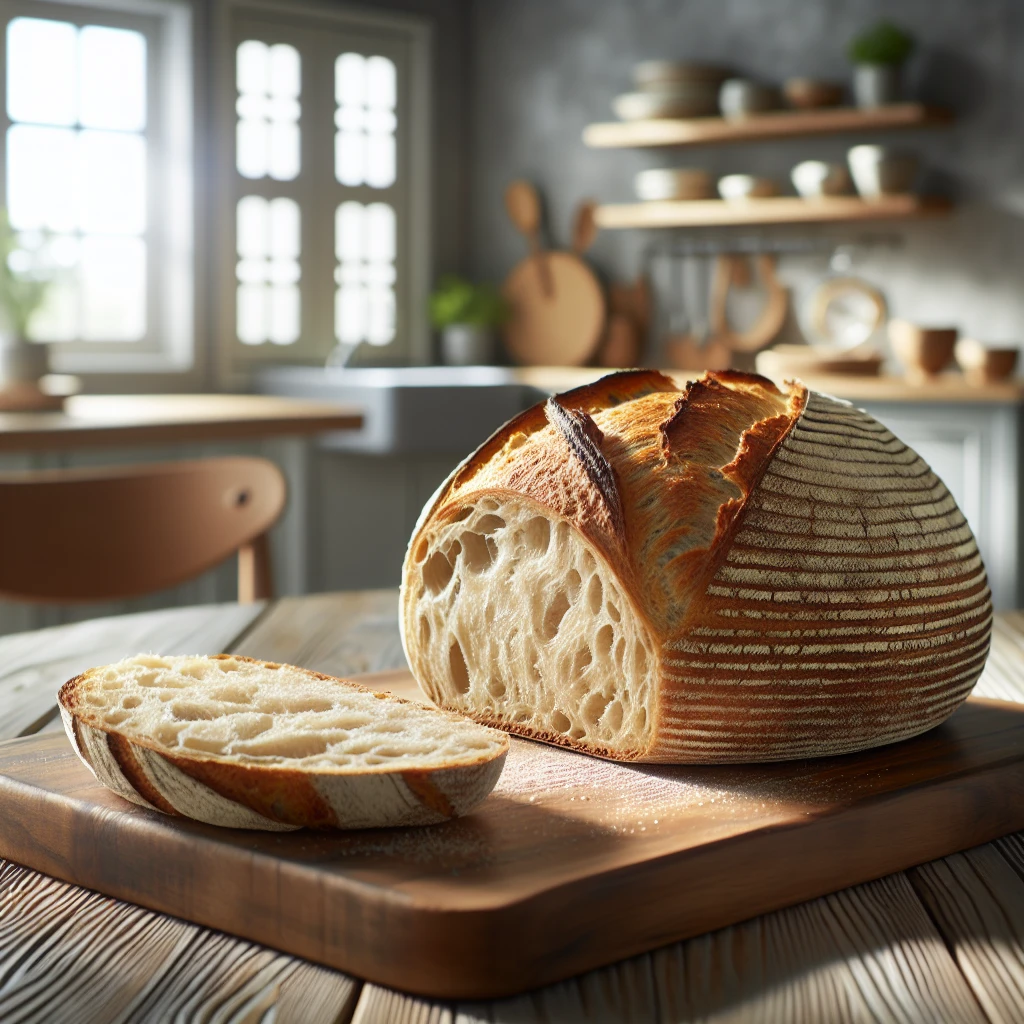
Artisanal Sourdough Bread
If you've ever wanted to try your hand at baking, this Artisanal Sourdough Bread is a great place to start. With just a few simple ingredients, you can create a homemade loaf that's both rewarding and delicious. Let's dive in and discover the magic of sourdough.
This post may contain affiliate links. As an Amazon Associate, we earn from qualifying purchases.
Ingredients for Artisanal Sourdough Bread
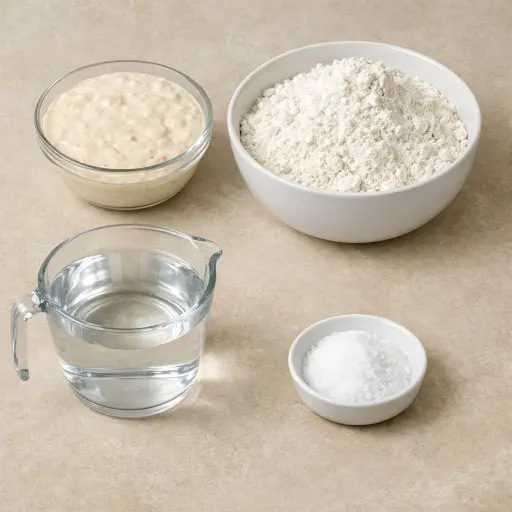
The soul of this bread is the sourdough starter. It acts as a natural leavening agent, giving the bread its distinctive flavor profile. The all-purpose flour serves as the main structure, providing the necessary gluten to give the bread its chewy texture. Water is essential for hydrating the dough, aiding in gluten formation and fermentation. Finally, salt is not just for flavor; it strengthens the dough and controls the fermentation process, ensuring a well-balanced loaf.
Why This Artisanal Sourdough Bread Works
At the start, the sourdough starter, water, and flour sit together and relax. During this rest, the flour soaks up the water and the gluten starts to form on its own, so the dough already feels smoother before much kneading. Once the dough is kneaded, those gluten strands line up and get stronger, so the dough can stretch instead of tear. That strong but stretchy dough is what traps the gas from the sourdough starter later on.
Over the long rise, the natural yeast in the starter slowly eats the flour and fills the dough with tiny bubbles. As hours pass, the dough gets lighter and puffier, but it still holds its shape because of that earlier kneading and the salt keeping it from rising too fast. In the hot Dutch oven, the trapped steam keeps the outside soft for a while, so the loaf can spring up more before the crust sets. By the time the lid comes off, the bread has risen fully, and the dry heat finishes the thick, crackly crust while the inside stays moist and chewy.
Artisanal Sourdough Bread Tips & Tricks
- If your dough is too sticky during kneading, sprinkle a bit more flour, but be cautious not to add too much.
- For a stronger sour flavor, let the dough rise for the full 12 hours.
- Keep your sourdough starter healthy by feeding it regularly, even when not in use.
Mistakes To Avoid
Using a weak or unfed starter leads to dough that barely rises in the bowl. The dough stays heavy and slack, so in the oven it spreads out instead of puffing up. The finished loaf comes out flat, tight inside, and can feel gummy even when fully baked.
Letting the dough rise too long in that 6–12 hour window often makes it collapse later. The gluten stretches and then weakens, so when it goes into the hot Dutch oven, it can deflate and bake into a wide, dense disc with big random holes and thick, chewy patches.
Adding extra flour during kneading until the dough feels “dry” turns the loaf tough. The dough for sourdough should stay a bit sticky; when too much flour goes in, the crumb bakes up tight and bready instead of open and airy, and the crust can feel hard rather than crisp.
Slicing before the loaf has fully cooled traps steam inside the cut surfaces. The crumb then compresses and turns pasty, so even a well-baked sourdough can seem underdone and rubbery in the center.
Equipment Used:
Ingredients
- 1 cup sourdough starter
- 3 cups all-purpose flour
- 1 1/2 cups water
- 1 tablespoon salt
Step-by-step Instructions
- 1. In a large bowl, mix 1 cup of sourdough starter with 1 1/2 cups of water.
- 2. Add 3 cups of all-purpose flour and 1 tablespoon of salt. Stir until a rough dough forms.
- 3. Let the dough rest for 30 minutes.
- 4. Knead the dough on a floured surface for 10 minutes until smooth.
- 5. Place the dough in a lightly greased bowl, cover, and let it rise at room temperature for 6-12 hours or until doubled in size.
- 6. Preheat the oven to 450°F. Place a Dutch oven inside to heat up.
- 7. Shape the dough into a round loaf and place it on parchment paper.
- 8. Carefully transfer the dough with parchment into the hot Dutch oven.
- 9. Cover and bake for 20 minutes. Remove the lid and bake for another 25 minutes until golden brown.
- 10. Cool on a wire rack before slicing.
Trending Now

Oven-Baked Pork Chops
Enjoy a delightful dinner with these tender and juicy oven-baked pork chops, seaso...
View Recipe
Traditional Corn Casserole
A delightful corn casserole dish that embodies the comforting flavors of sweet cor...
View Recipe
Traditional Cucumber and Tomato Salad
A refreshing and simple salad combining crisp cucumbers and juicy tomatoes, season...
View Recipe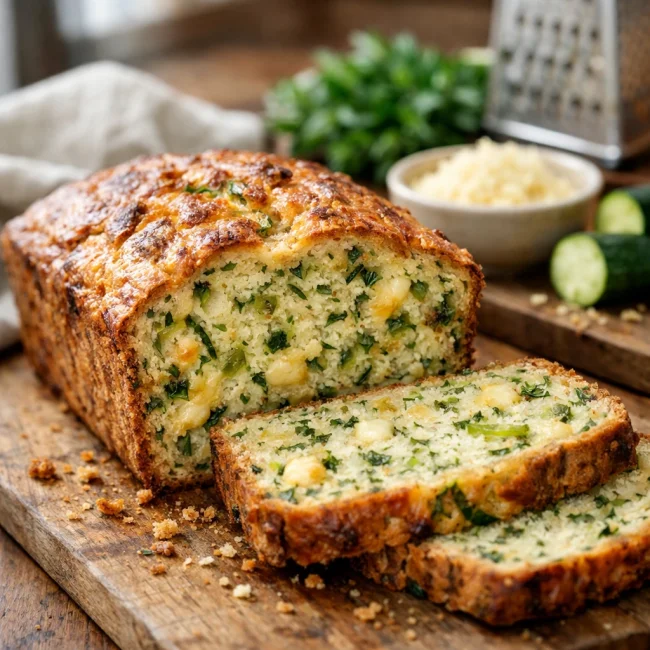
Savory Zucchini Bread
Savory Zucchini Bread is a delectable twist on traditional zucchini recipes, combi...
View RecipeFrequently Asked Questions
- Why is my bread dense?
- Dense bread can result from under-proofing. Ensure your dough has risen adequately before baking.
- Can I use whole wheat flour?
- Yes, but you may need to adjust the water content as whole wheat flour absorbs more moisture.
- How do I store sourdough bread?
- Store it at room temperature in a bread bag or wrapped in a towel for up to 3 days. Avoid refrigeration, which can dry it out.
Serving Ideas for Artisanal Sourdough Bread
This sourdough bread is a versatile base for many meals. Try slicing it and topping with avocado and a sprinkle of sea salt for a simple yet satisfying breakfast. It's also fantastic as a side with soups, stews, or a hearty salad. For a gourmet touch, serve with a selection of cheeses and charcuterie.
More Breads & Baked Goods Recipes

Traditional Italian Easter Bread
Savor the delightful taste of a classic Italian Easter bread, a sweet, soft, and s...
View Recipe
Old-Fashioned Pineapple Bread
A delightful and flavorful bread infused with juicy pineapple, perfect for breakfa...
View Recipe
Old-Fashioned Blueberry Muffins
Transport yourself to simpler times with these delightful old-fashioned blueberry ...
View Recipe
Strawberry Basil Scones
These tender scones combine the sweetness of fresh strawberries with a hint of pep...
View Recipe